Ready To Go…..
- May 23rd. 2014
- By mapw
Ready To Go
#different
After a little over 2,000 miles the first set of RS29’s are now somewhat past their best and with a track evening coming up a new set are in order. Upon visual inspection there appeared to be just about enough ‘meat’ left on them for an evening track session, but upon closer inspection it was much more obvious that they were in need of replacement.
So a new set of RS29s for the Alcon 4 pot calipers, ready to go in. The top and bottom edges were chamfered prior to fitting as they were being used with the existing discs which are still in very good condition:
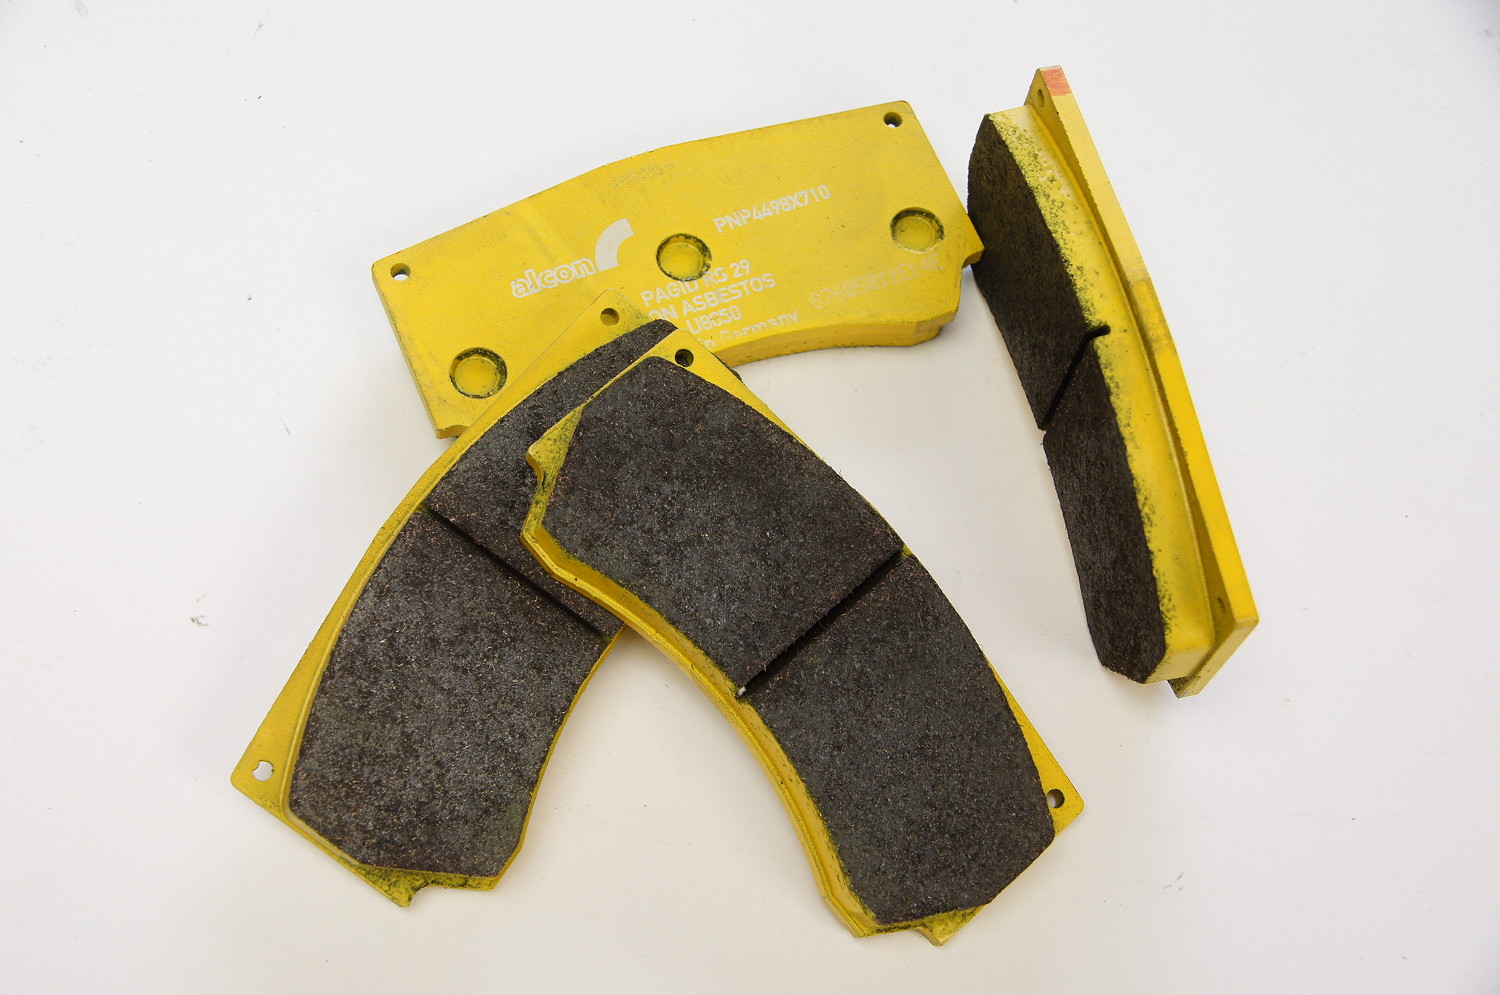
Pagid RS29 Brake Pads
Replacing these ones which have certainly been put to work!
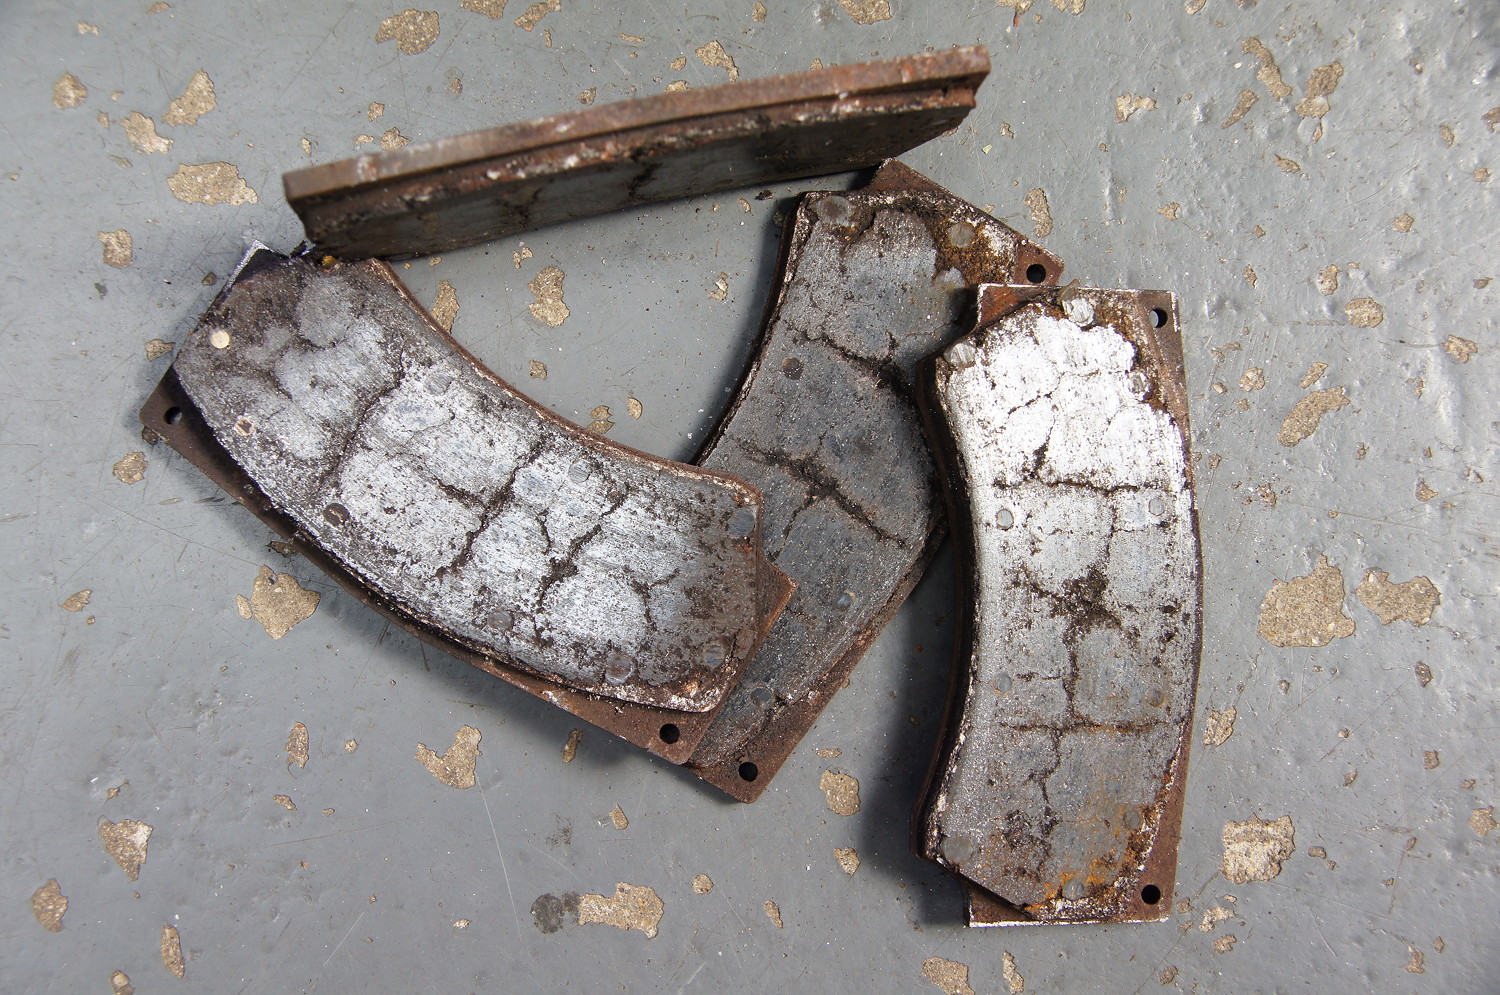
A well used set of RS29s
Much better now, good for another track season. They just need bedding in now, following the suggested Pagid bedding-in procedure:
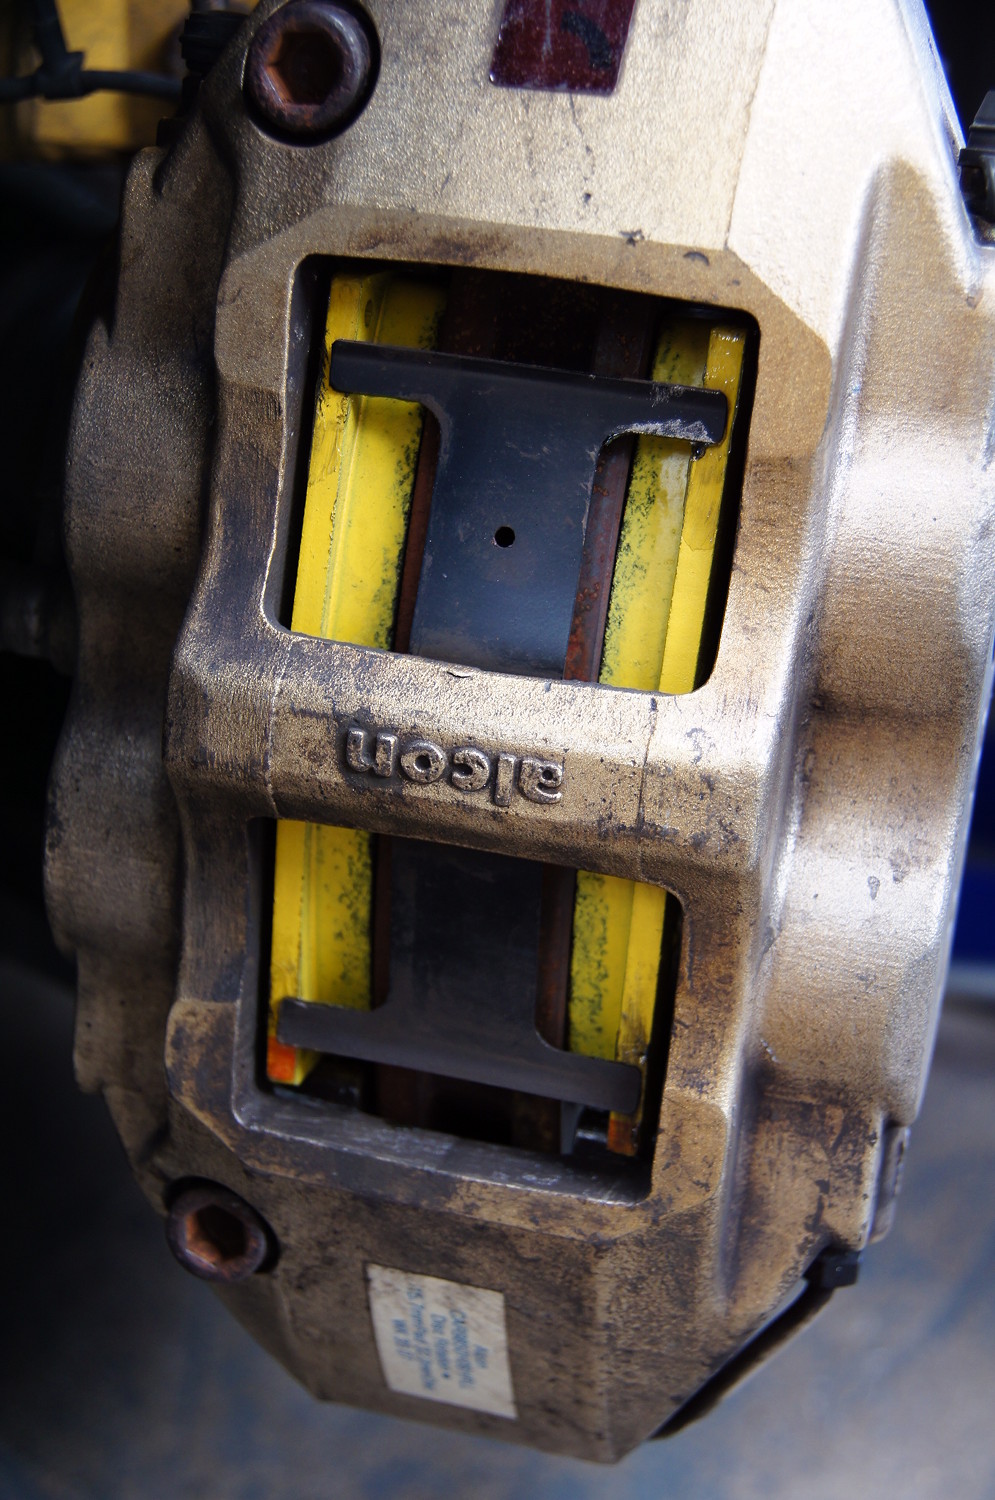
Pads Fitted
And when the pads were fitted Cera Tec was used where required in place of the usually chosen copperslip, mainly due to its high heat resistance. Cera Tec is a metal-free high temperature resistant (up to 1000° C) anti-squeal lubricant for braking systems. Easier to apply and much less messy than the alternatives!
Advantages of Cera Tec
On the rolling road over the last few days for final mapping and optimisation, with 99 Octane fuel in the tank. This was to map the ecu to take advantage of the new inlet manifold, steel rods and the K06 turbocharger to make sure fuelling, ignition timing and boost pressure were all correctly optimised. Too lean and Exhaust Gas Temperatures (EGTs) and Cylinder Head Temperatures become too high potentially causing the exhaust manifold to crack, or cause a spark plug tip to fail and burn off or worst case scenario a piston could melt. Too rich will kill power and cause possible bore wash leading to premature internal wear. The ignition timing needs to be optimised to be as advanced as possible for maximum power gains, but without instigating any knock retard due to detonation, which again will cause running issues and eat into the ecu’s safety margin, especially when driven hard on track.
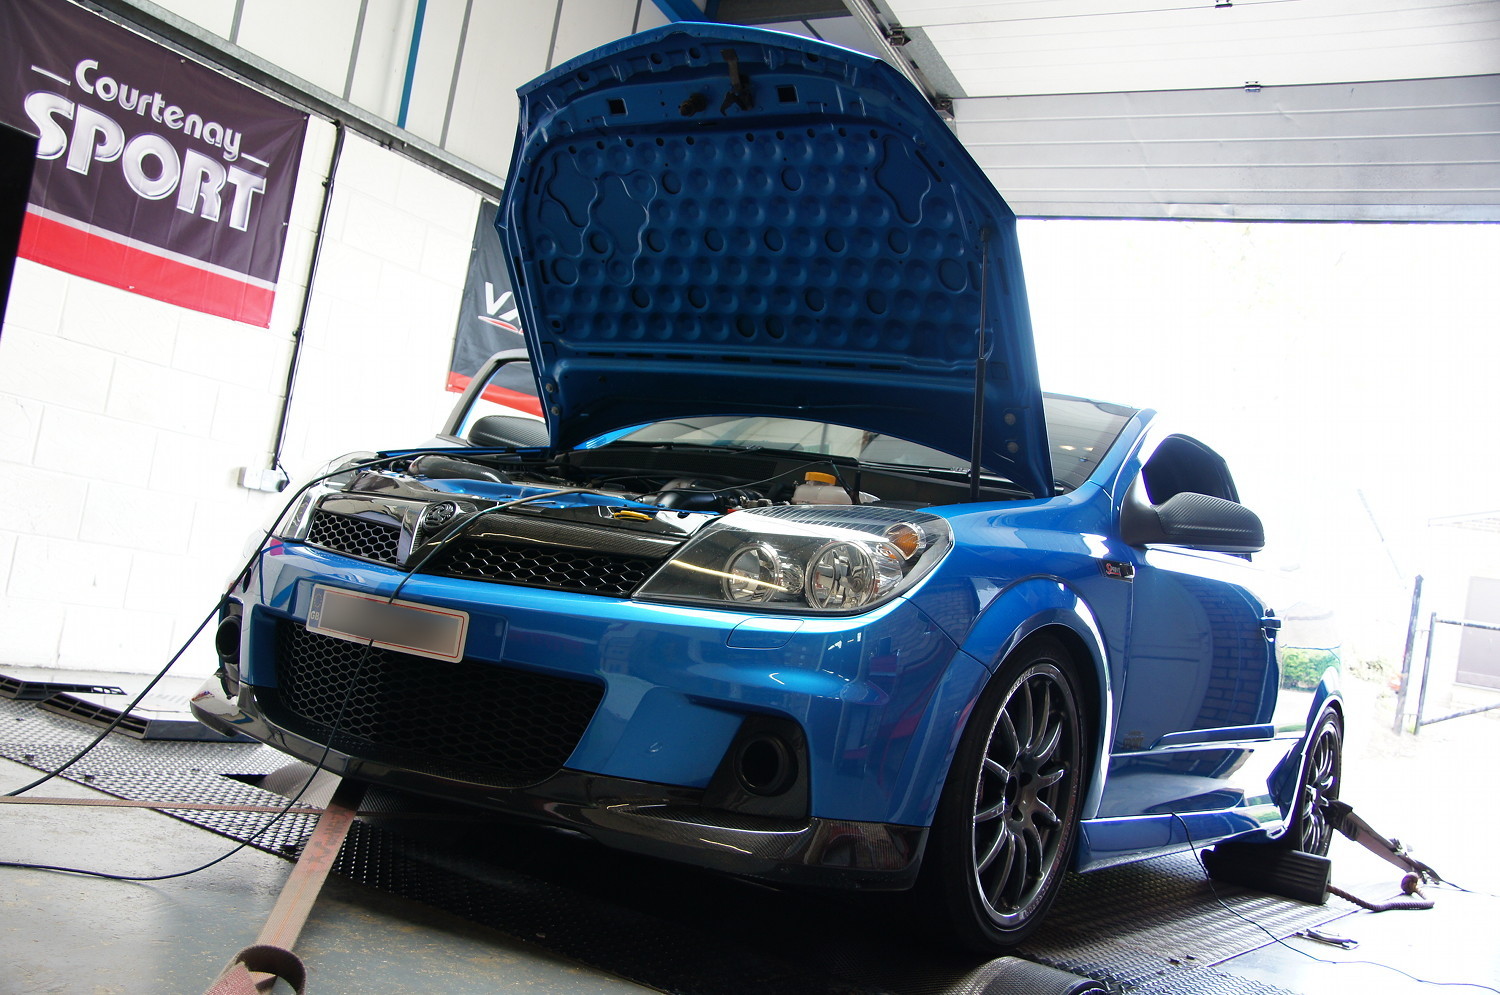
On the Rolling Road
When the car was again mapped back in June 2012, after I had made the first changes to the car the engine was producing good Stage 3 power and torque of 292bhp with 342lb ft torque (290bhp and 336lb ft on another run), with ignition timing, knock retard and fuelling all correct and safe which made the car very useable on track and road. Last time the car was checked on the rolling road during 2013 it achieved 300bhp during an unloaded run, although running a little leaner due to the lack of load.
Now the ecu is being mapped to suit the new spec. With a base map configuration for the new set up the improvement was to 327bhp, however the engine was running far too lean through the mid range, then richening up above 5,000rpm so this fuelling certainly needed addressing.
A quick adjustment to the actuator was made to alter the break off pressure, further rolling road runs were made to check fuelling, boost and ignition and all the relevant changes were made to the software after consulting the data logging output.
This final mapping session with mapping changes has produced a very healthy 336bhp and 355lb ft torque (repeated on two back to back loaded runs) and even after several hot runs (heat being a big issue with turbocharged cars – they hate it and it is kills power) the engine produces around 328-330bhp, so very good for a 90,000 mile engine.
These changes have made a massive difference to the overall car with huge gains in power and torque above 3,500 rpm where it is all useable. The difference in the power and torque is clearly evident and can be seen in the graph below:
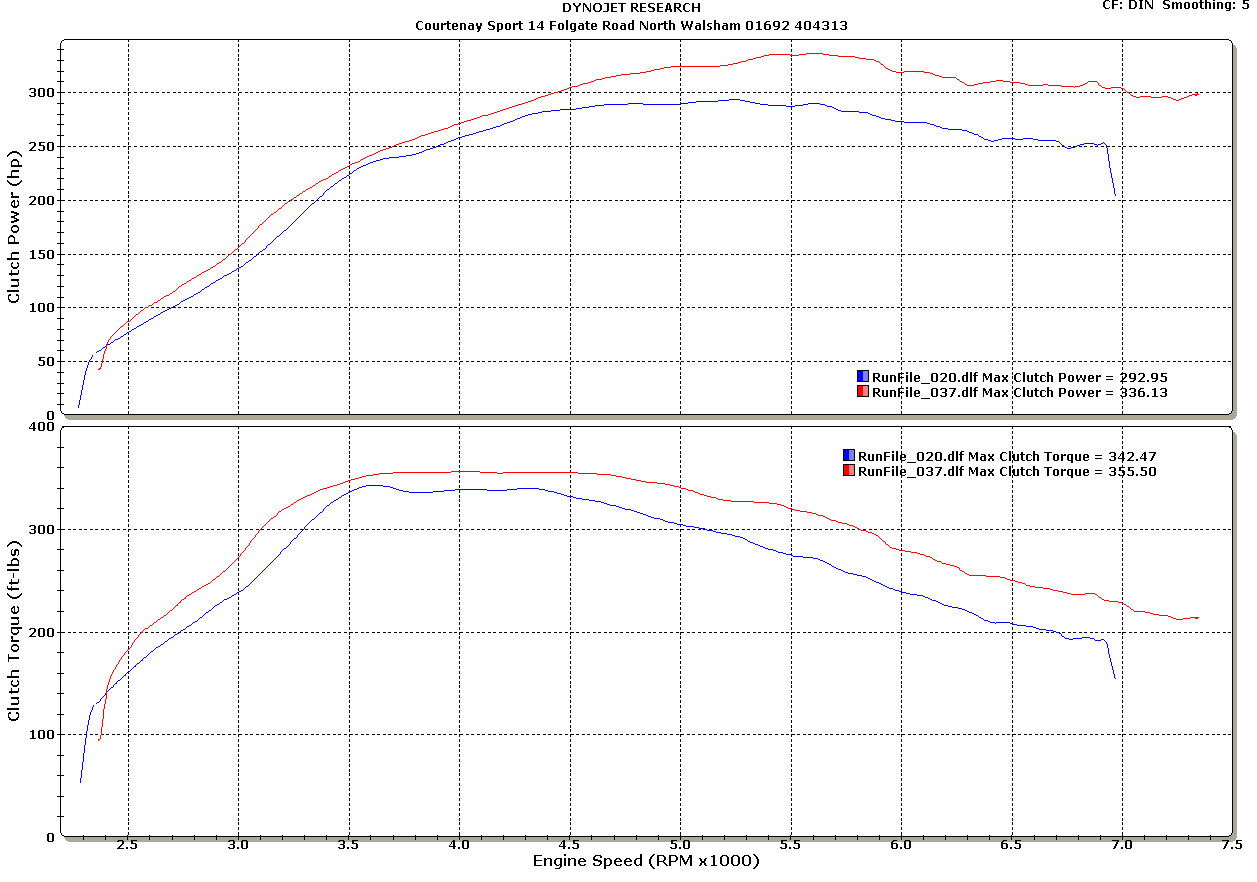
Before and After Power and Torque Graphs
To help with air flow, yet retaining the ‘direct route’ Astra CDTi air box, some porting of the lower part of the box has been carried out. At the bottom there is a large hole which lines up with a hole in the inner wing to help draw in more fresh air, plus some additional holes to the side away from the heat of the engine bay and turbo, again to help maximise airflow.
Porting the air box usually adds around 5-8bhp on average, compared to running the same set up without a ported air box. With heat ingress being such a big issue with turbo charged cars this is a preferred option than switching to an open cone filter, where the air box set up will flow enough air. With an open cone filter there may be some gains seen on a rolling road with the bonnet open and plenty of air flow around, but there is more danger of heat soak with the bonnet shut especially when being driven hard on track and with the small K06 turbo. It is likely that with a cone filter the gains are likely to be minimal to say the least, due to the fact the turbo is relatively small and is working pretty hard to achieve the given power. Might be worth a try one day though……. In the meantime……

Ported Airbox
…..and the odd teething trouble!
Today the front bumper was refitted ready for the first road test after the winter’s rework. Really just an opportunity to have a brief shakedown and check engine oil and gearbox oil coolers and temperatures. After the fuel pressure was adjusted using a new 4 bar regulator, the ecu was mapped and a brief check on the rolling road showed a safe but not fully optimised map giving a ‘useful’ 327bhp. On the road the car wasn’t driven in anger as the mapping has not yet been fully optimised, but it was instantly apparent that the power and torque gains are massive across the whole rev range. Even driven at ¾ throttle the acceleration is immense, compared to a Stage 3 300bhp car and the transformation is unbelievable. You have to experience it to fully appreciate it.
It was also an ideal opportunity to check the new engine and gearbox oil coolers. The engine oil cooler and temperature all seemed fine. Gearbox oil temperature rose to about 73 degrees C so it was time to try the new oil cooler. Back at base the switch was flicked on……. Nothing! No pump noise, no green LED to indicate power to the pump. Very strange as I had checked, double checked and triple checked all the wiring before everything went back together. So it was time to do a bit of investigative diagnostics.
The first thing was to put a live feed from the battery to the switch feed on the relay; this would power up the pump and check if the issue was a faulty pump or something to do with the switched side of the wiring. So on investigating the relay, ready to put some power to the switched terminal, it became immediately apparent that one of the relay earth connectors had pushed back out of the relay housing…… that would do it!!! Carefully pushed it back into the relay housing and refitted the relay. Bingo! LED illuminated and gearbox oil pump whiring quietly to itself. Fantastic because I was convinced there were no wiring issues, so a misconnected relay pin was a simple fix. And dare I say it easy to overlook when the relay was originally pushed into the housing.
Upon further checking round I then noticed a very slight weep from the banjo union back into the top of the gearbox, despite being sealed with copper washers. Clearly the face on top of the gearbox isn’t quite 100% square. So plan B for this union…. None of the other oil fittings using the same banjos and banjo bolts was leaking. So to get at this union it was a case of quickly popping out the battery and bracket – it all comes out as one unit once the three bolts are removed and the battery clamps are disconnected – nice and straight forward now, unlike with a factory battery and battery tray. Unscrew the banjo bolt and clean everything down using degreaser. Refit with a pair of dowty washers which incorporating a rubber seal as well should seal better onto the gearbox face. This was in place of the copper washers which were originally used, despite the fact the chosen copper washers are the same as the ones used on the turbo oil drain to the block. Once all back together, flick the pump back on. The moment of truth…… sorted. Pump fully operational as before and oil flow back into the gearbox……. and no leaks.
So next it will be onto finalising the mapping, and an overdue wash and detail. And a new set of Pagid RS29 brake pads for the front alcon calipers and a new set of tyres.
Only a minor thing, but neat presentation and finishing touches are the difference between just doing a job and doing a job properly. The gearbox oil temperature sender loom, most of which has been cable tied neatly out of the way, just needed something to stop it dangling around and interfering with the rubber clutch pipe and the reverse light wiring so a P clip has been added. There was already an M8 thread in the gearbox casing which was handy, it seemed a shame not to make use of it!
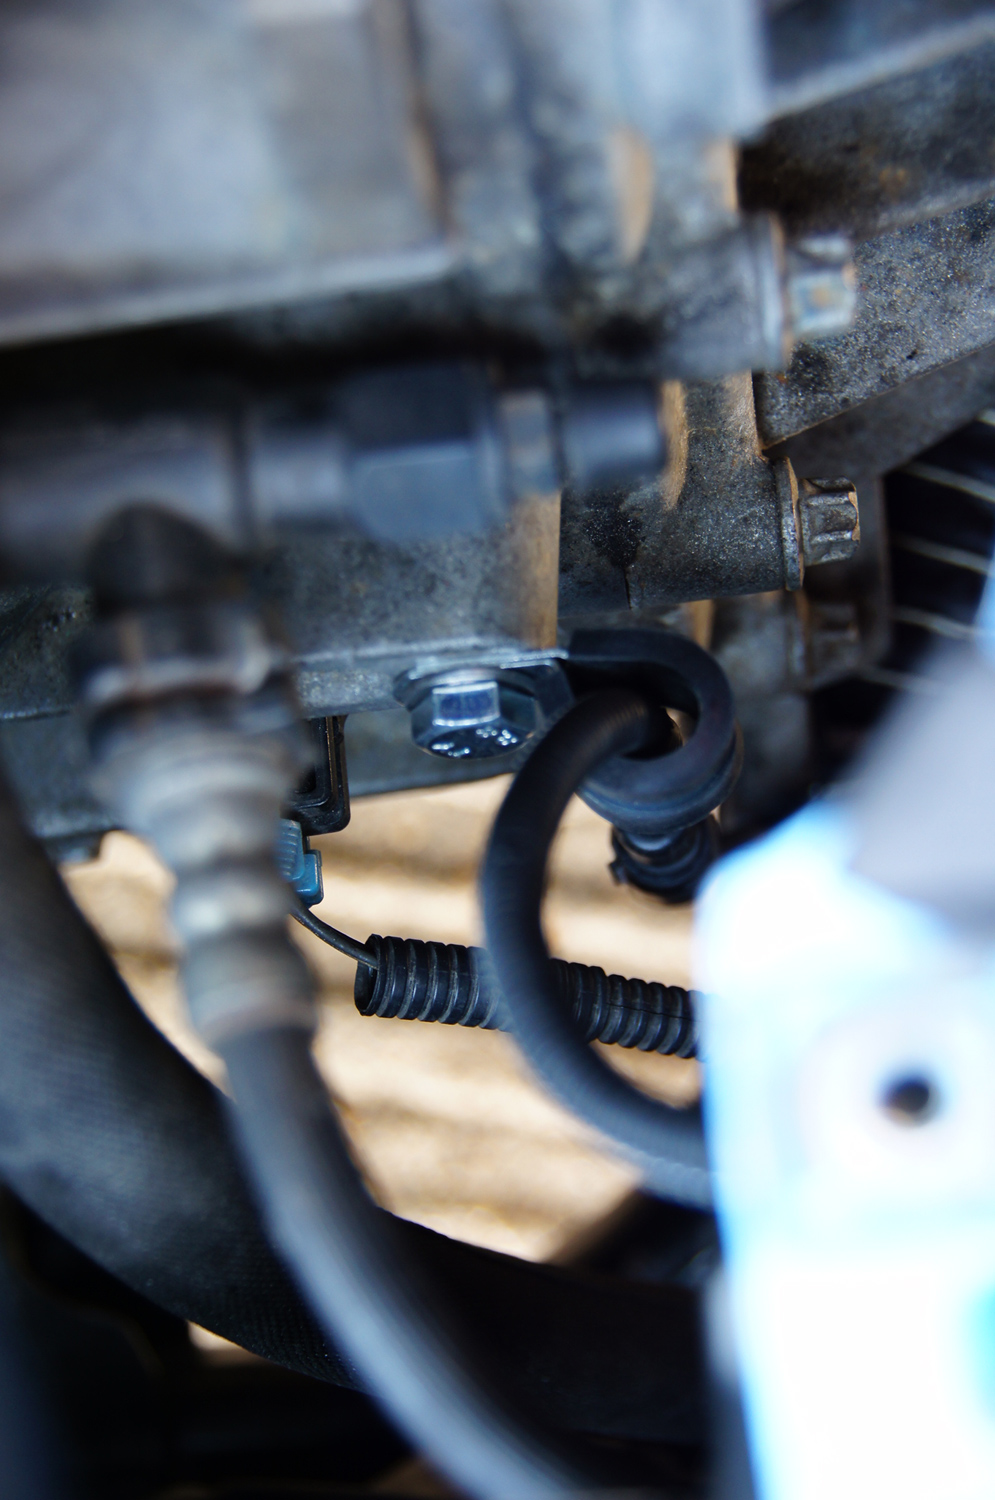
Gearbox Sender Loom and P Clip
Whilst I was in the same general area I noticed a 90 degree edge at the base of the gearbox oil cooler pump bracket, which formed a sharp point. Not really a major problem but doubtless I’ll reach underneath at some point in the future and find it still there – the hard way. So quickly radiused it using the finger grinder, so it is a nice smooth curve now.
When remapping the Astra H VXR fitted with a K04 (standard) VXR turbo, there are occasions where an uprated actuator is required, usually when aiming for 290-300bhp (or as close to it as you can get) when using the factory K04 KKK turbocharger. The factory actuator has a static break off pressure of around 10psi or so. An uprated, stronger actuator with a static break off pressure of around 12-14psi is needed to overcome the back pressure that builds up in the small exhaust manifold behind the penny valve. The stronger actuator allows for a smoother boost curve and more mid range torque because it can overcome the back pressure and keep the penny valve closed. Without a stronger actuator the back pressure builds up, and despite the electronic boost control, it becomes too strong for the standard actuator and overcomes it, blowing open the penny valve and causing a loss of mid range boost, at around 3,000 – 3,500 rpm.
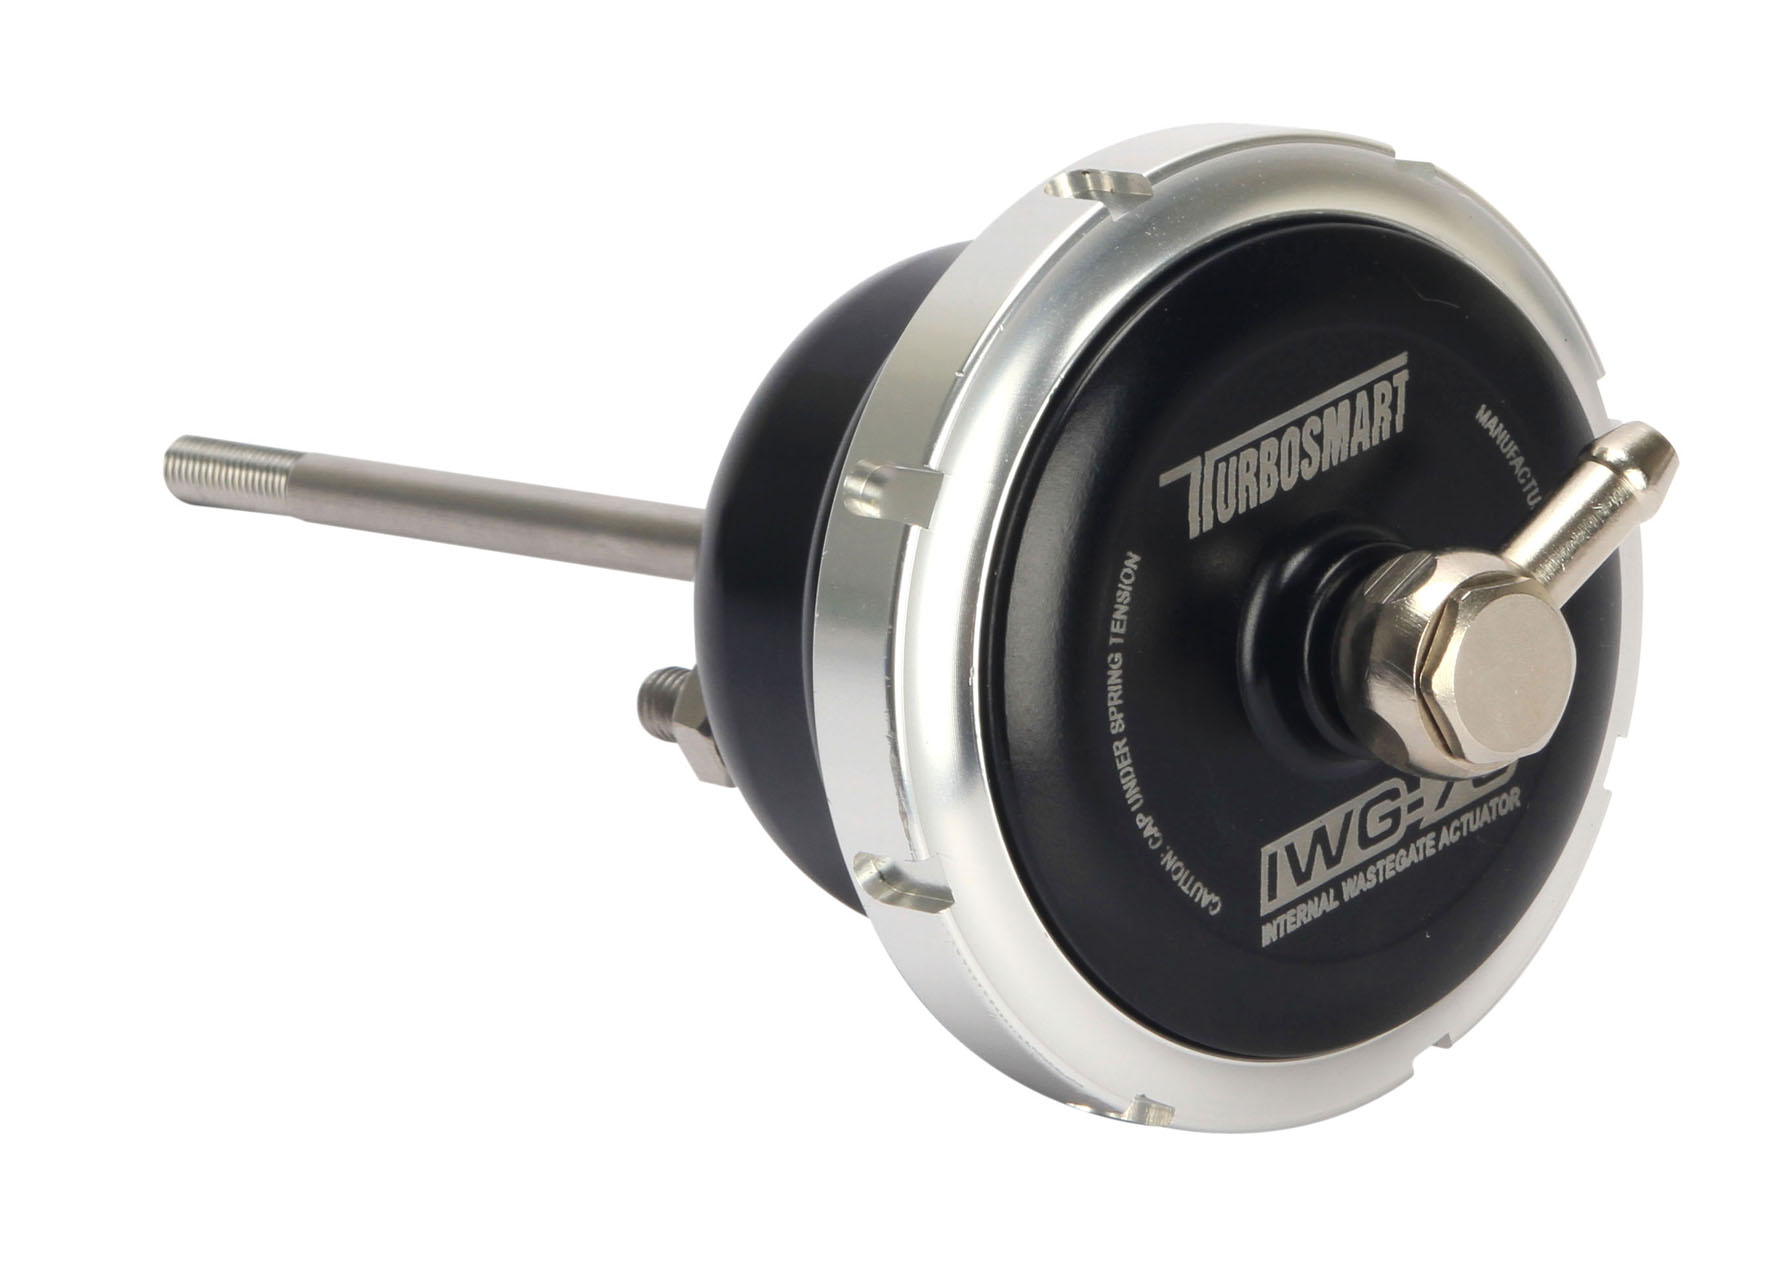
For the K06 hybrid turbo that is being used here, which has a billet K06 compressor wheel and a cut back to the turbine (exhaust) wheel, back pressure is much less of an issue due to the cut back reducing the back pressure in the exhaust system and improving the flow through the manifold and down the exhaust. In this instance an actuator with a static break off pressure of around 10psi is suitable. Whilst 10psi is the same break off pressure of a standard VXR actuator the Turbosmart actuator pictured here also has the facility to have the internal springs changed to make it stronger if required, so it seemed an ideal time to try one as the car is due for mapping and final set up. Plus it is a very ‘smart’ looking actuator (excuse the pun!) compared to a standard one.
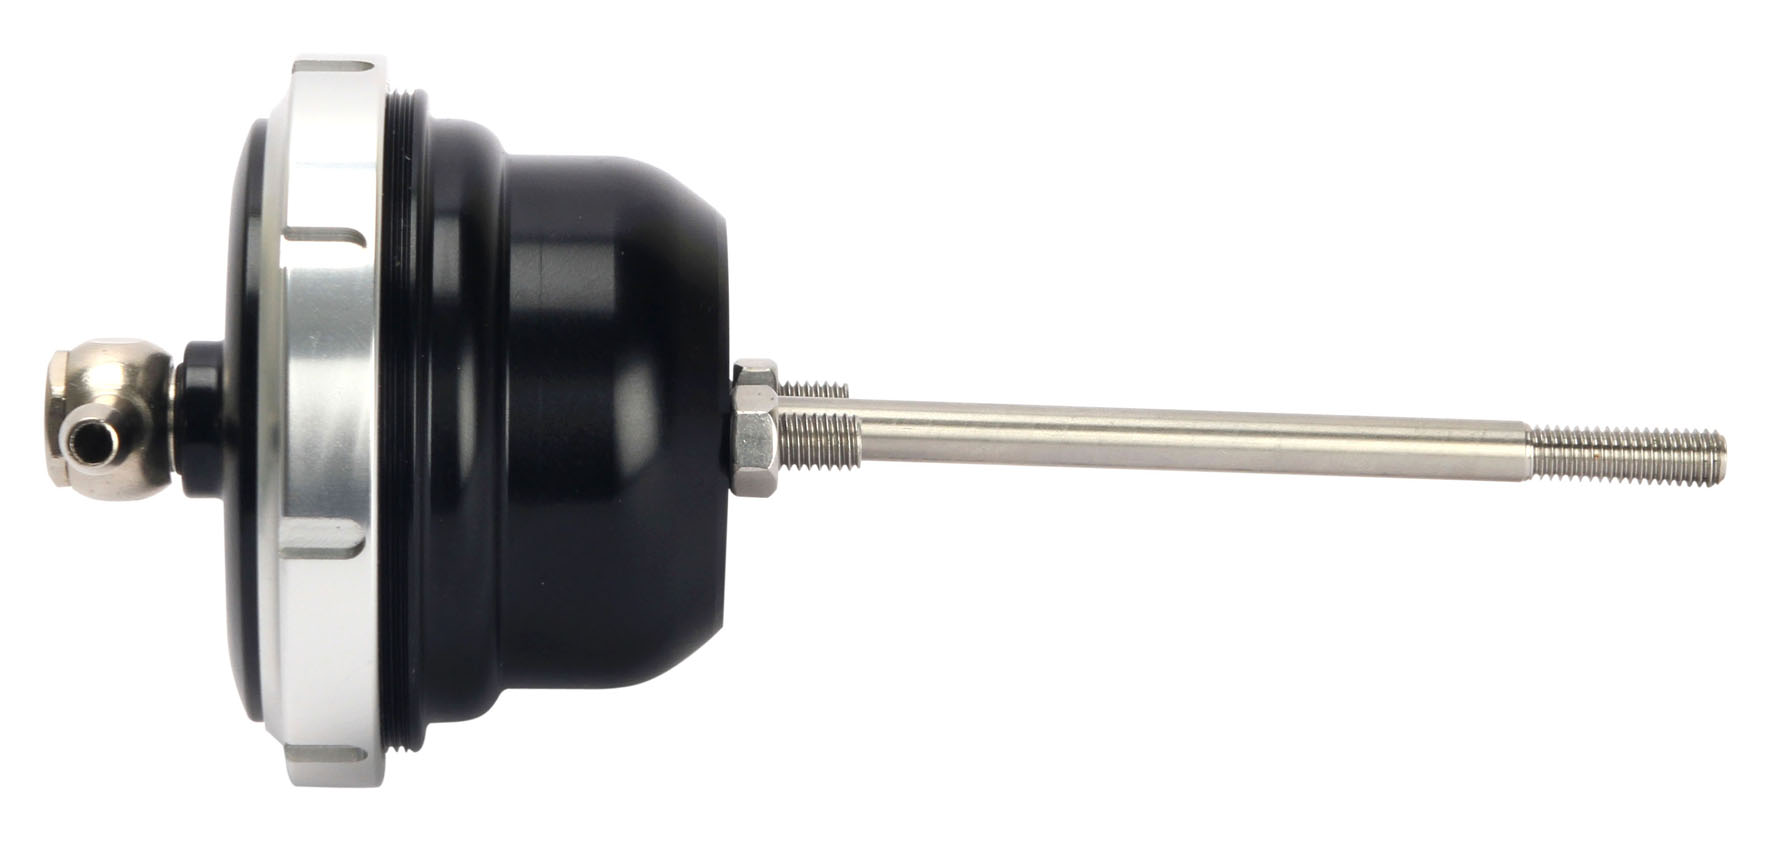
Turbosmart Actuator
Turbosmart Actuator
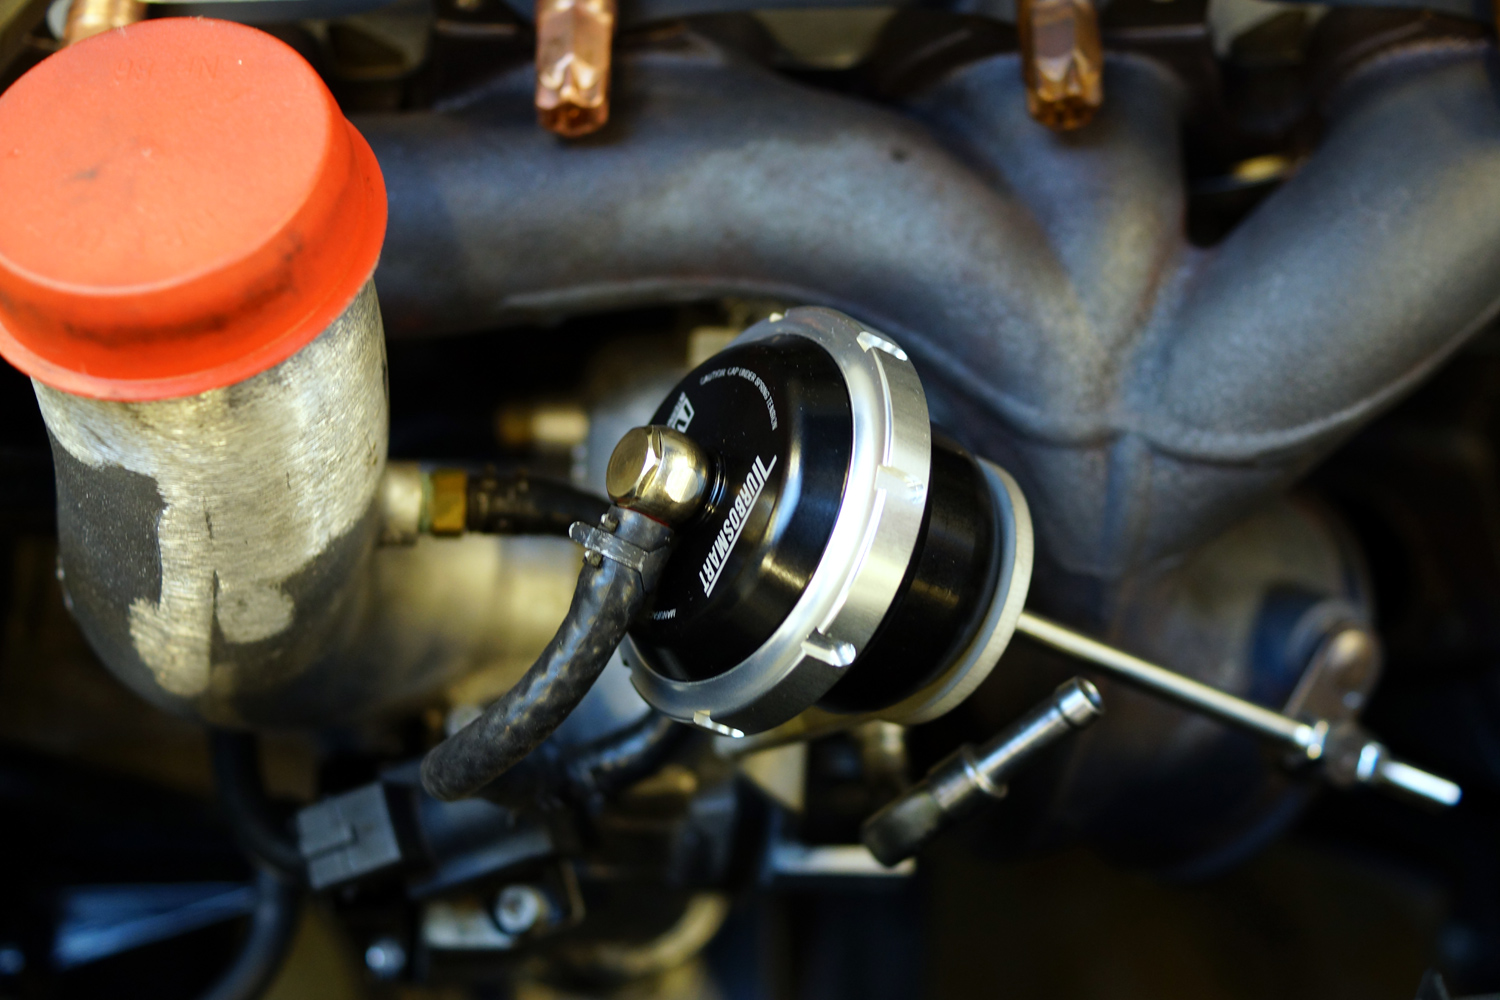
Turbosmart Actuator Fitted
A picture of the gauges installed and functioning in the dual vent pod. Boost Gauge (Left) and Dual Oil Temperature Gauge showing the Engine Oil Temperture (Top) and Gearbox Oil Temperature (Bottom. The functions and settings for the SPA gauge are controlled by the red push button mounted on the steering cowl, visible bottom left:
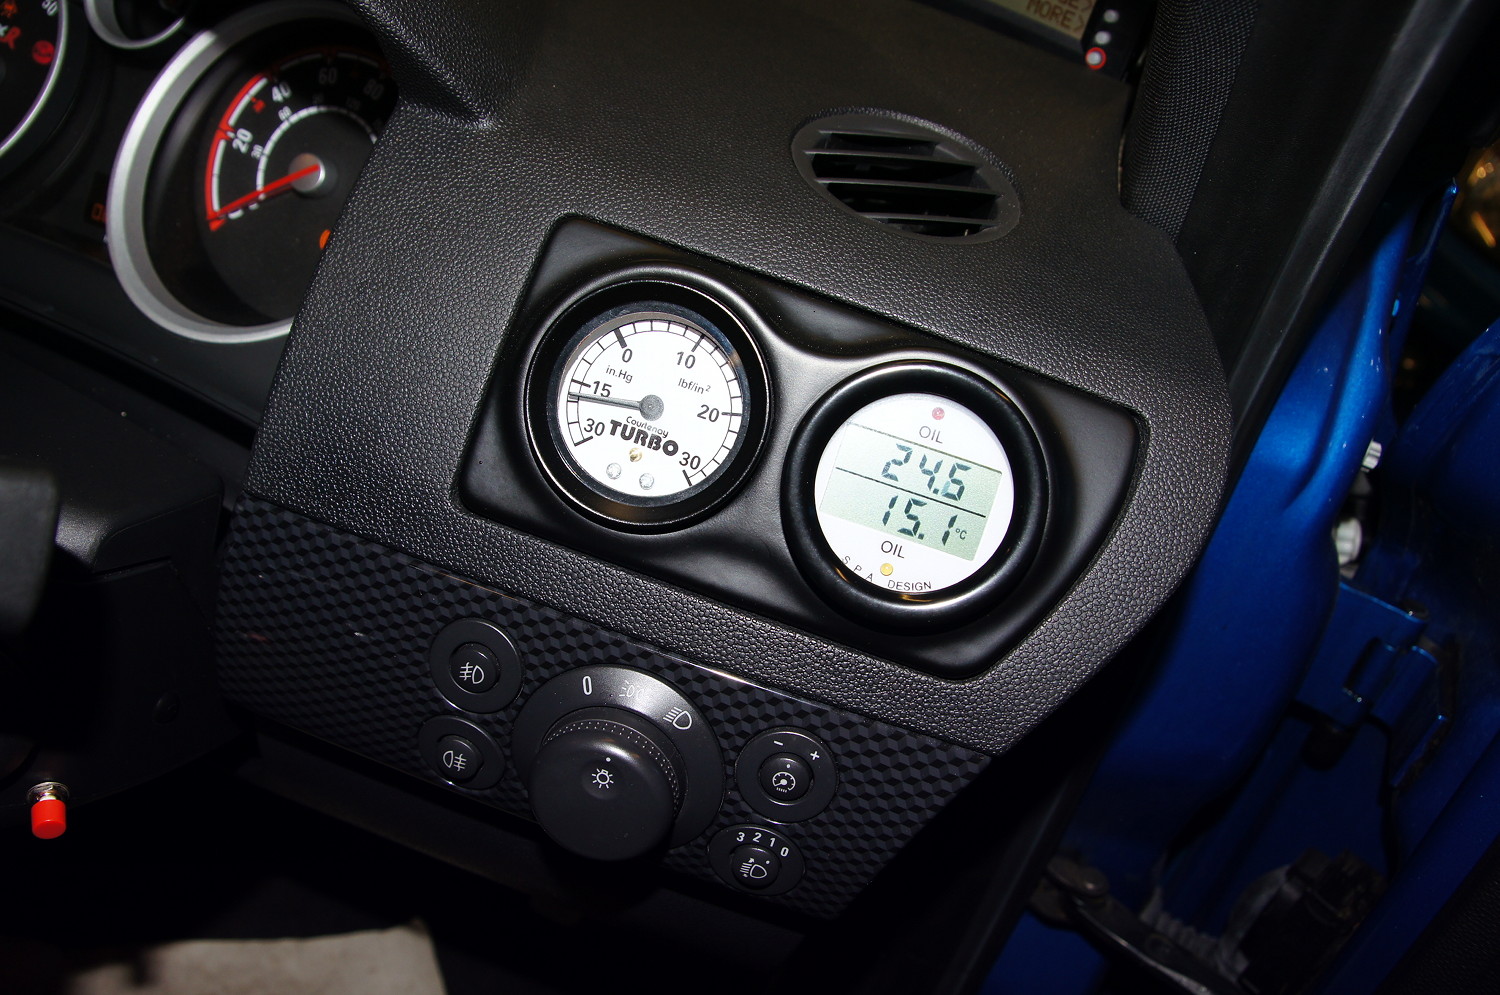
Gauges Installed
So a box arrived this morning with the new gearbox oil:
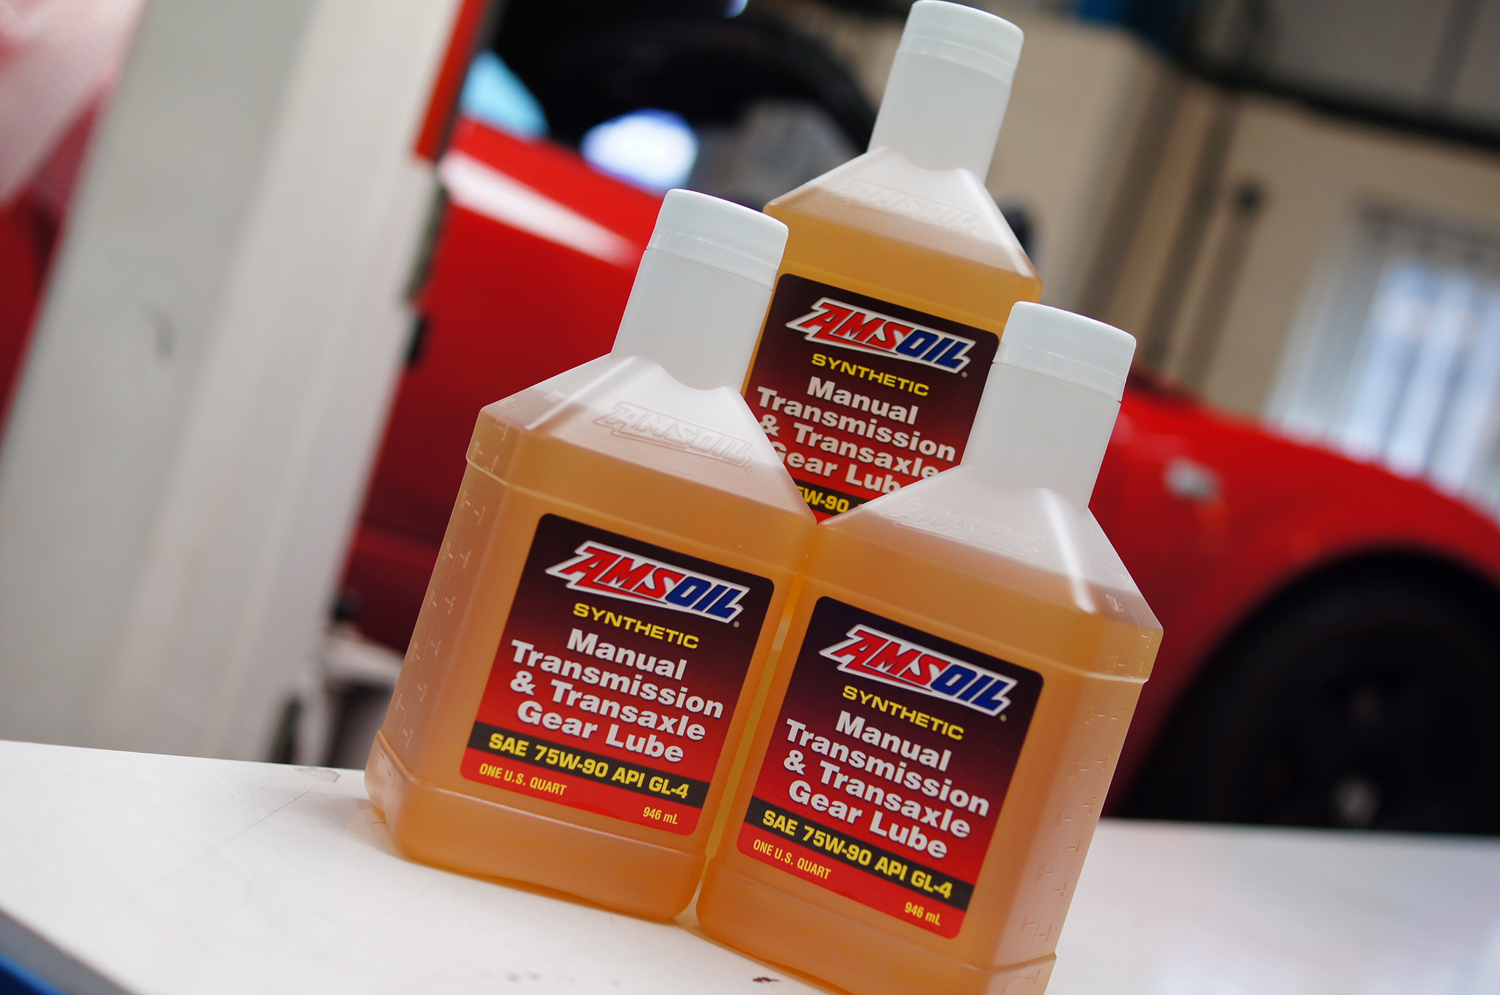
Amsoil 75w-90 MTG
Being an American company the bottles are 1 US Quart (946ml). The track car with the addition of the oil will take about 3 litres, and also the road car is due a gearbox oil change as well, so ordered 7 bottles to be on the safe side and have some spare.
After a lot of research, and some advice from Performance Oils Ltd, I chose AMSOIL Fully Synthetic Manual Transmission and Transaxle Gear Lube (MTG), 75w-90. Research indicated that it remains ‘in grade’ for longer at higher temperatures and also will stay in grade at temperatures up to 170 degrees C, which this oil will never see so will also be ideal in gearboxes where an oil cooler is not fitted.
It is a premium blend of the finest synthetic base oils and advanced, high-performance additives. It is formulated specifically for maximum protection in the most demanding manual transmission and transaxle applications where an extreme pressure GL-4 gear lube is specified, including those where high horsepower/high torque engines and towing or heavy loads increase transmission stress.
AMSOIL MTG prevents the thinning effects of mechanical shear. It maintains its viscosity and superior film strength for consistent, long-lasting wear protection. MTG excels in hot and cold temperature extremes that exceed the limits of conventional mineral oils. It protects against rust, keeps seals soft for long life, and is compatible with brass synchros for smooth synchromesh shift quality
Ideal for Front Wheel Drive Transaxles:
The advanced synthetic formulation provides ultimate protection for gears and bearings in front wheel drive transaxles.
MTG is a thermally stable, extreme pressure formulation that resists heat, oxidation, acid build-up and varnish. It is the ideal gear lube for high temperature applications, so should be ideal for the M32 gearbox.
Performance Features
• Reduces friction, heat and wear
• Superior high temperature stability
• Resists heat, oxidation, acid build-up and varnish
• Lasts two times longer than conventional petroleum oils
• Improves cold weather shifting
The addition of a gearbox oil cooler is to help keep the gearbox oil temperatures under control when on track. Without a cooler the gearbox oil temperatures can quite quickly rise to 120+ degrees C (if you let them) which can quickly degrade the gearbox oil. Using a very high quality fully synthetic gearbox oil is essential. Because the M32 gearbox does not dissipate heat readily the only way to bring the temperature down is to stop the car and leave it idle for about 20 minutes or so, and the oil temperature drops to mid 70’s and then another 20 minutes on track will bring the temperature back up again and so the cycle continues.
As far as the car is concerned on track this is the one thing that hinders its use, because everything else (water temperature, inlet air temperature, brakes) are absolutely fine.
Getting everything together for the gearbox oil cooler has taken a few months and the whole installation has taken a little longer than expected due to one thing and another (manly the lack of a suitable outlet fitting) but in the end I have got it all sorted.
So again after chatting to Think Automotive, we specced this Mocal Oil Pump with the following spec; Hardened bronze gear pump. Brass body 12 volt motor. Weight 3lbs. Flows up to 150 gallons per hour (UK)/680 litres per hour of oil. Pressure up to 50psi. Max temp 175 degrees C. Current draw 6 to 8amps. Rubber Mounted. Not cheap at £270+VAT but again given the other options probably the best pump for the job.
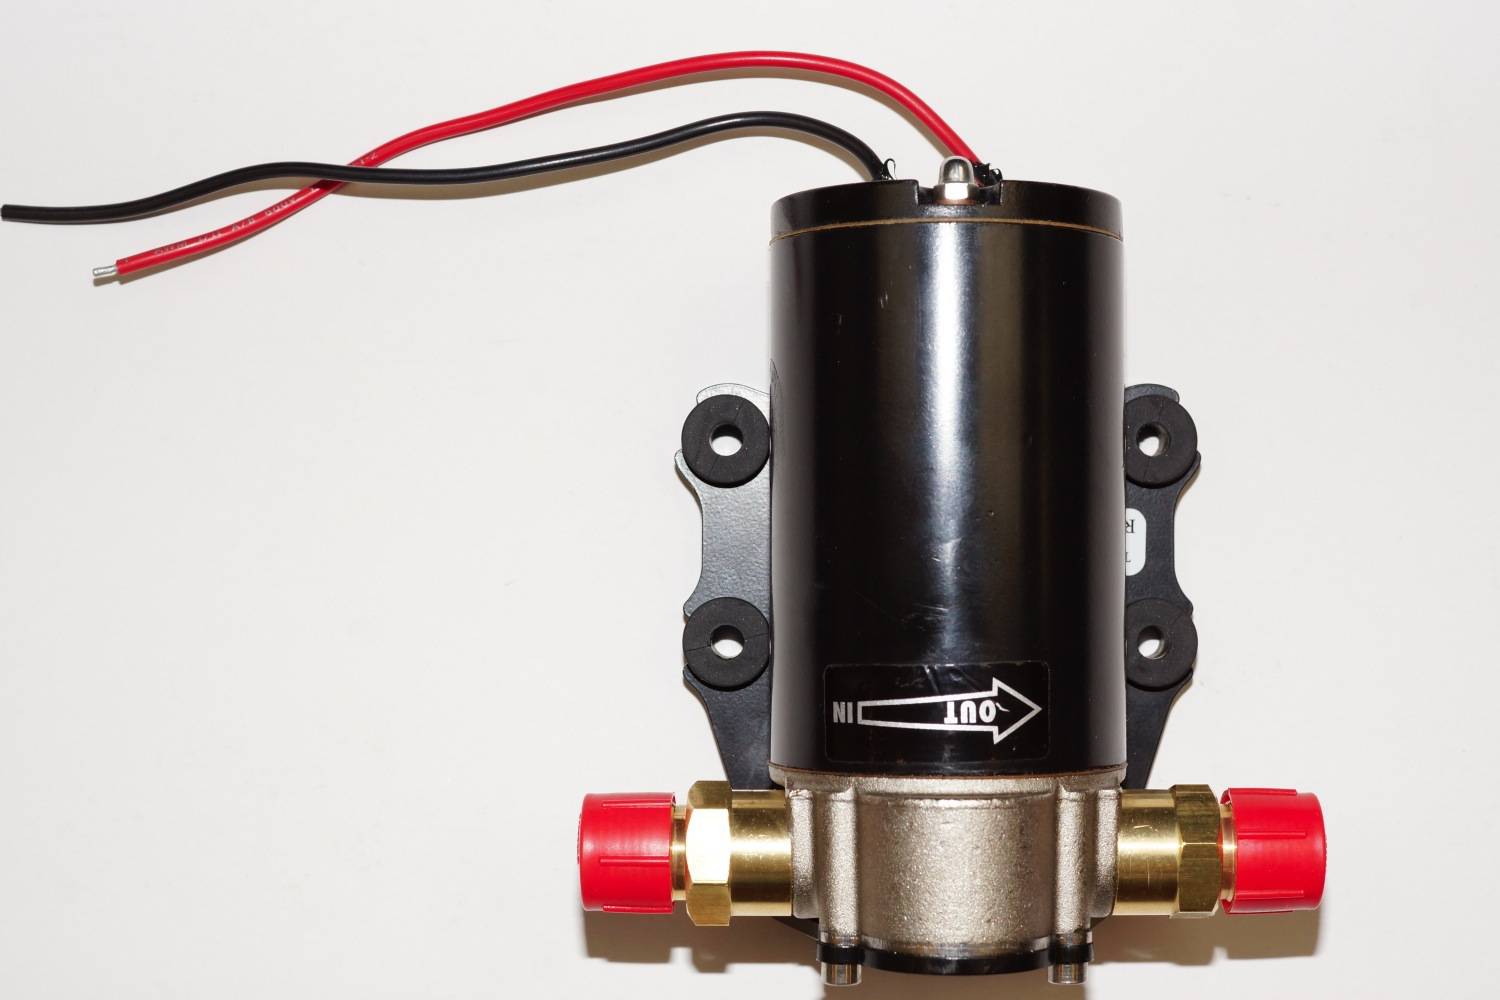
Mocal Oil Pump
An Earl’s Performance in-line oil filter will be added to the gearbox outlet pipework (just in case):
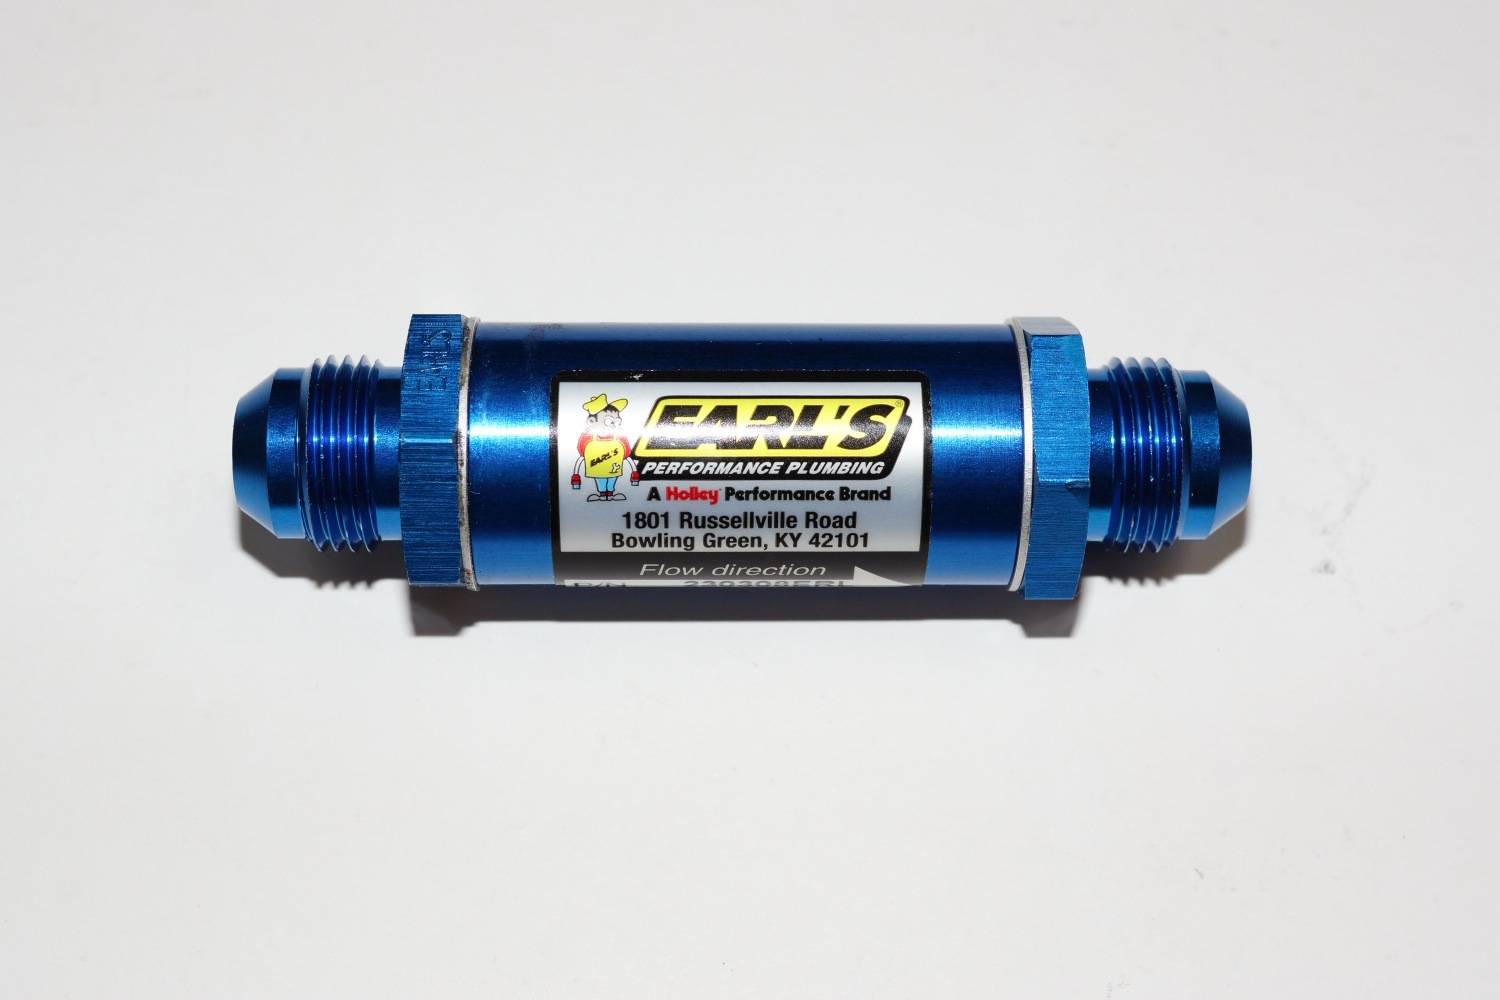
In Line Oil Filter
And a switch and LED for the pump:

Switch and LED
Which have been fitted into the tray which sites in front of the gear lever, so easily accessible and can be switched on when the oil temperature dictates:

Switch and LED Fitted
I have also added a fused relay for the gearbox oil cooler pump, mounted at the front of the Underhood Electrical Centre (UEC):

Relay Fitted
Banjos and Banjo Bolts for the oil cooler:
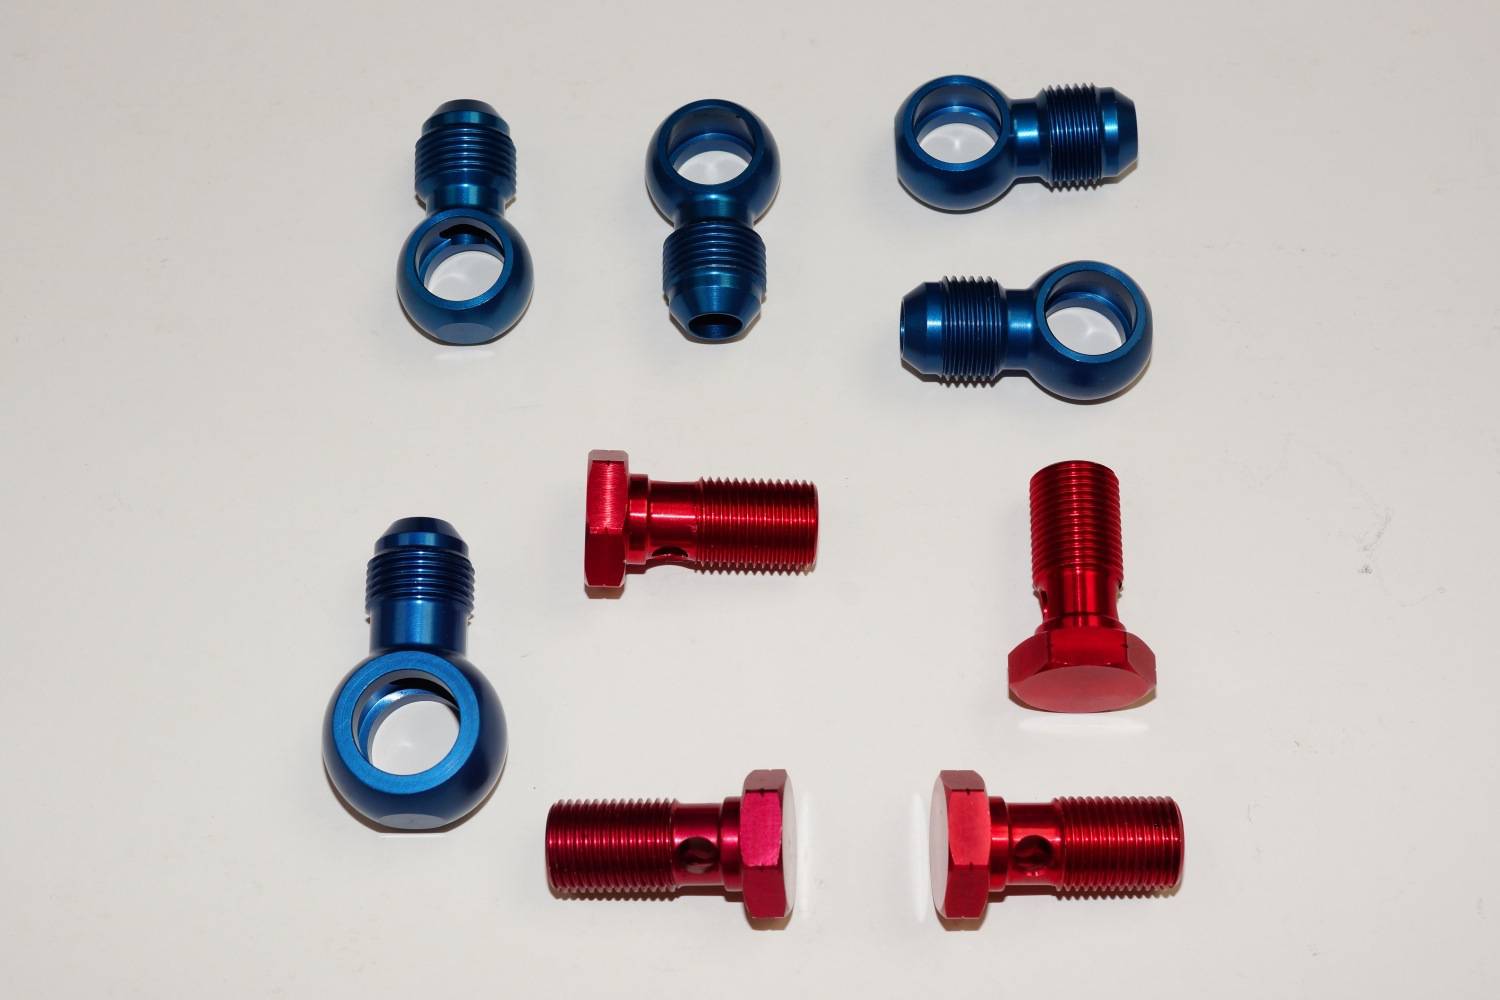
Banjos and Banjo Bolts
This is the factory (OE) engine oil cooler, which has been removed and cleaned out and will now be used as the gearbox oil cooler. The feed and return pipes have been fitted with the new anodised aluminium banjos and bolts and new oil sealing rings:
OE Oil Cooler
I then needed a bracket to mount the oil cooler to the car which was fabricated for me to a supplied template:

Oil Pump Bracket
Trial fitting of the gearbox oil cooler pump (prior to the bracket being finished), located behind the L/H wheel arch liner. Mounting to the chassis is via two pre-existing M8 mounting points, ordinarily used on the CDTi models to mount the engine ecu in the same location. (So if you have a 1.9 CDTi model then this will not work.) An additional brace will be fabricated to add further stability to the main bracket.
Oil Pump Mounted
And here is the bracket completed with the additional brace:
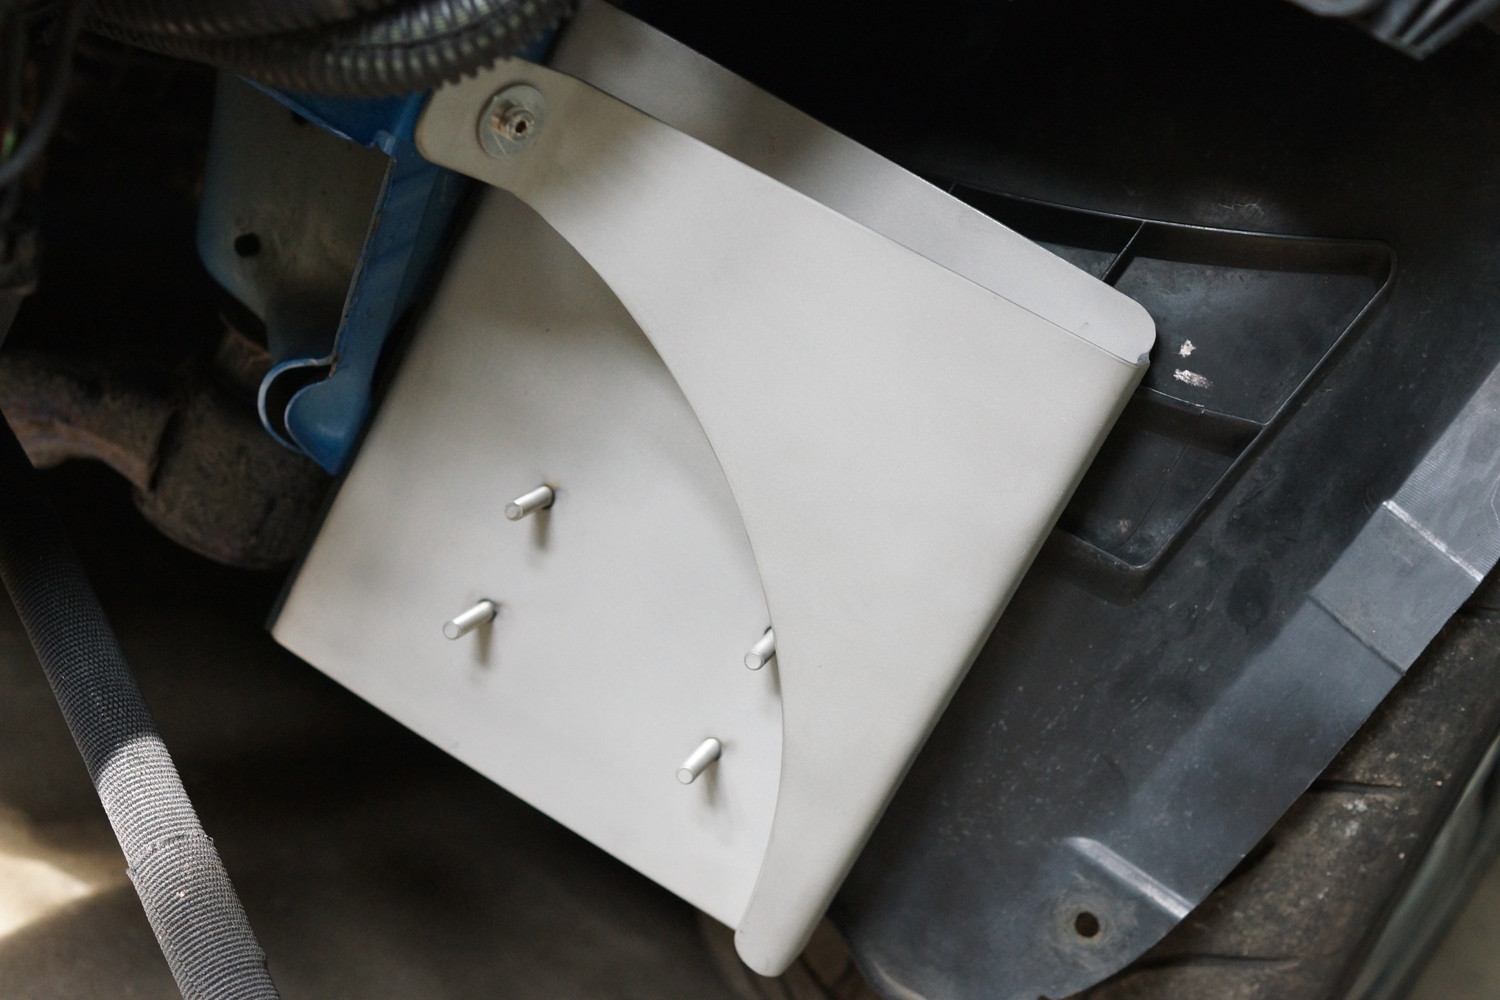
Bracket Fitted to Car
Onto the gearbox fittings. Most of the fittings were easy to track down from Think Automotive. The hardest one was for the outlet from the gearbox to the oil pump.
Gearbox Outlet Fittings for Gearbox Oil Cooler:
Top – M18x1.5 to -8AN straight with -8AN 90 degree Female to Male Adapter (an alternative would be to use a 90 degree elbow) but unfortunately neither arrangement at 60mm across will clear the Astra H subframe assembly.
Bottom – A much more compact 90 degree adapter (which is evident fom the picture) with an M18x1.5 thread for the gearbox outlet to a -8AN Male fitting which will connect up to the rest of the oil cooler pipework. At 40mm across it will just clear the subframe. Comes complete with o ring and metal sealing washer.
Unable to source this fitting (or anything similar) in the UK, it had to be ordered from the USA, but was a bargain at about US$6.
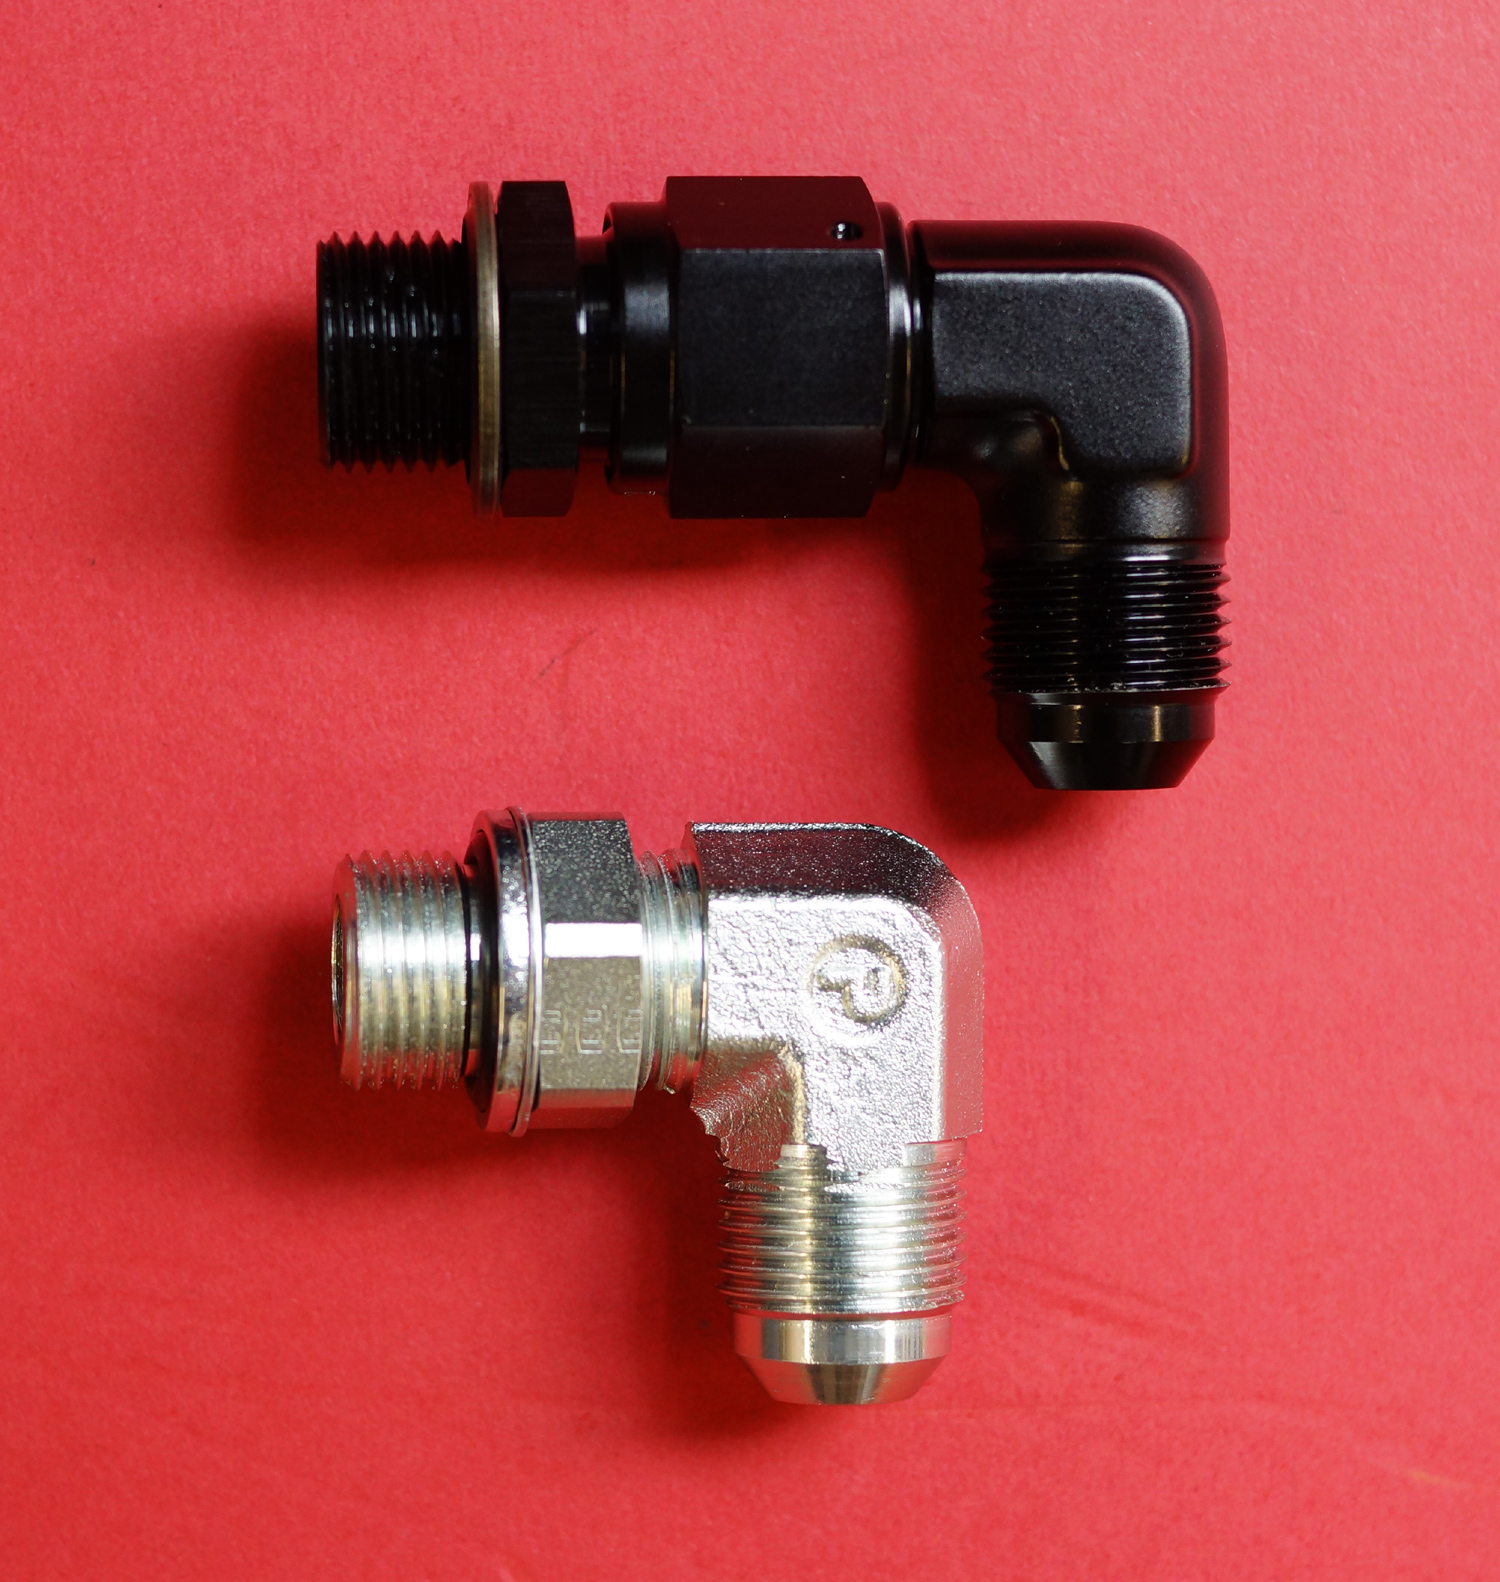
Gearbox Fittings
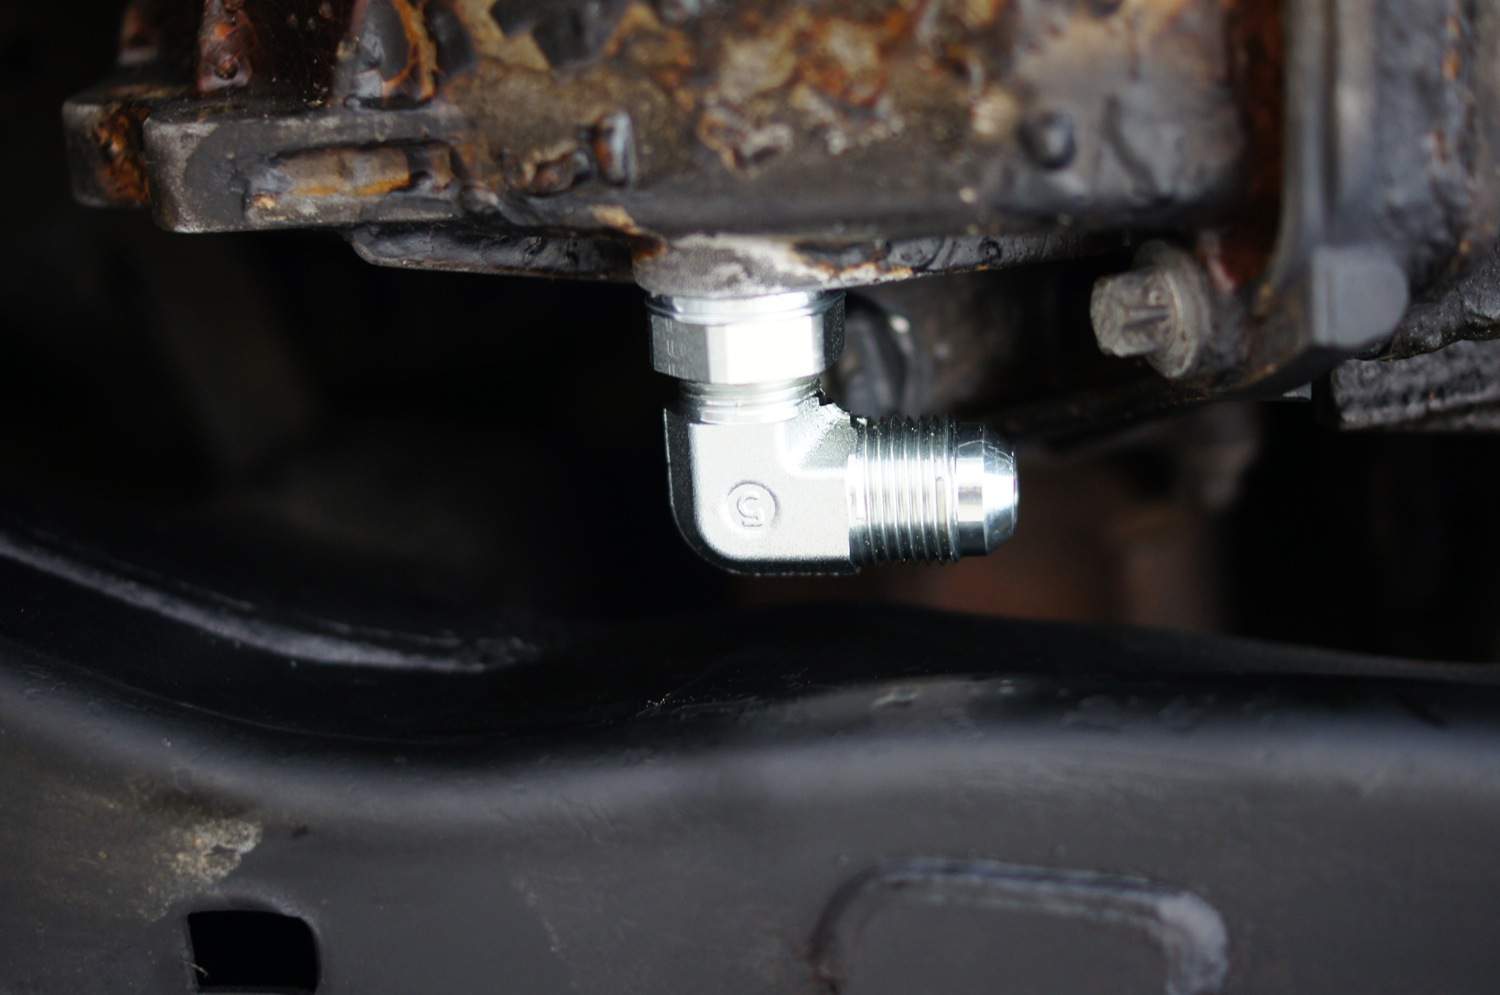
M18 x 1.5 to -8AN 90 Degree Elbow for the gearbox outlet:

M18 x 1.5 to -8AN 90 Degree Elbow
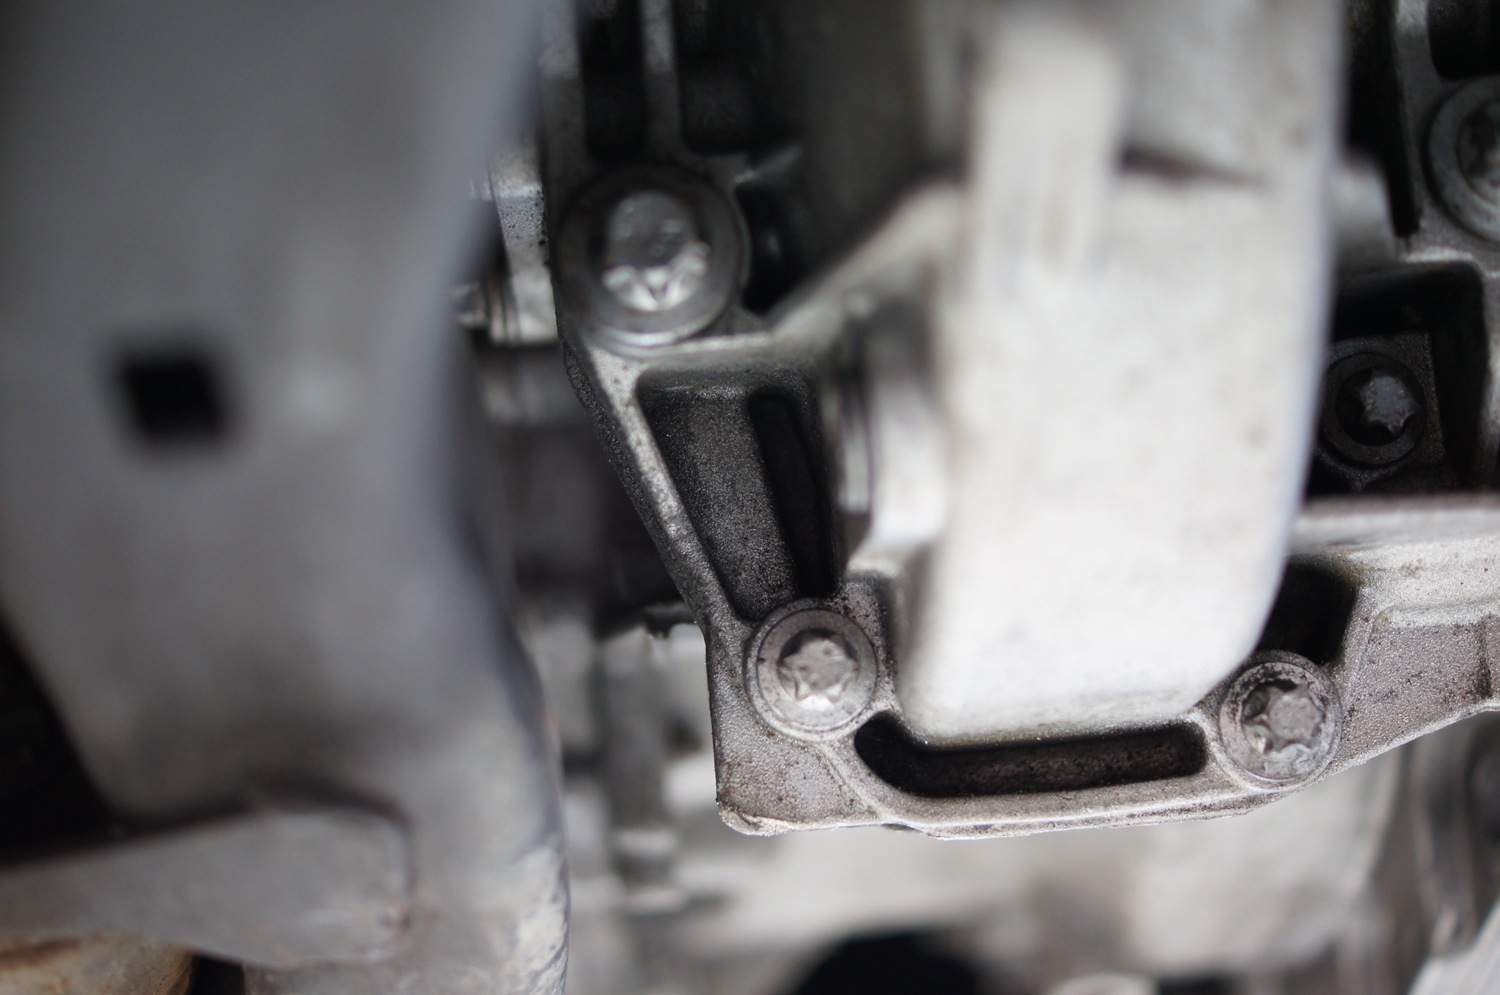
So having sourced a suitable 90 degree fitting, there was still a slight issue with clearance both trying to wind the fitting into the gearbox outlet (it catches on the integral washer on the bolt above it as well as part of the casing) and also on the pipework running from the fitting, where the casing is in the way (bottom right next to the subframe). Front View:
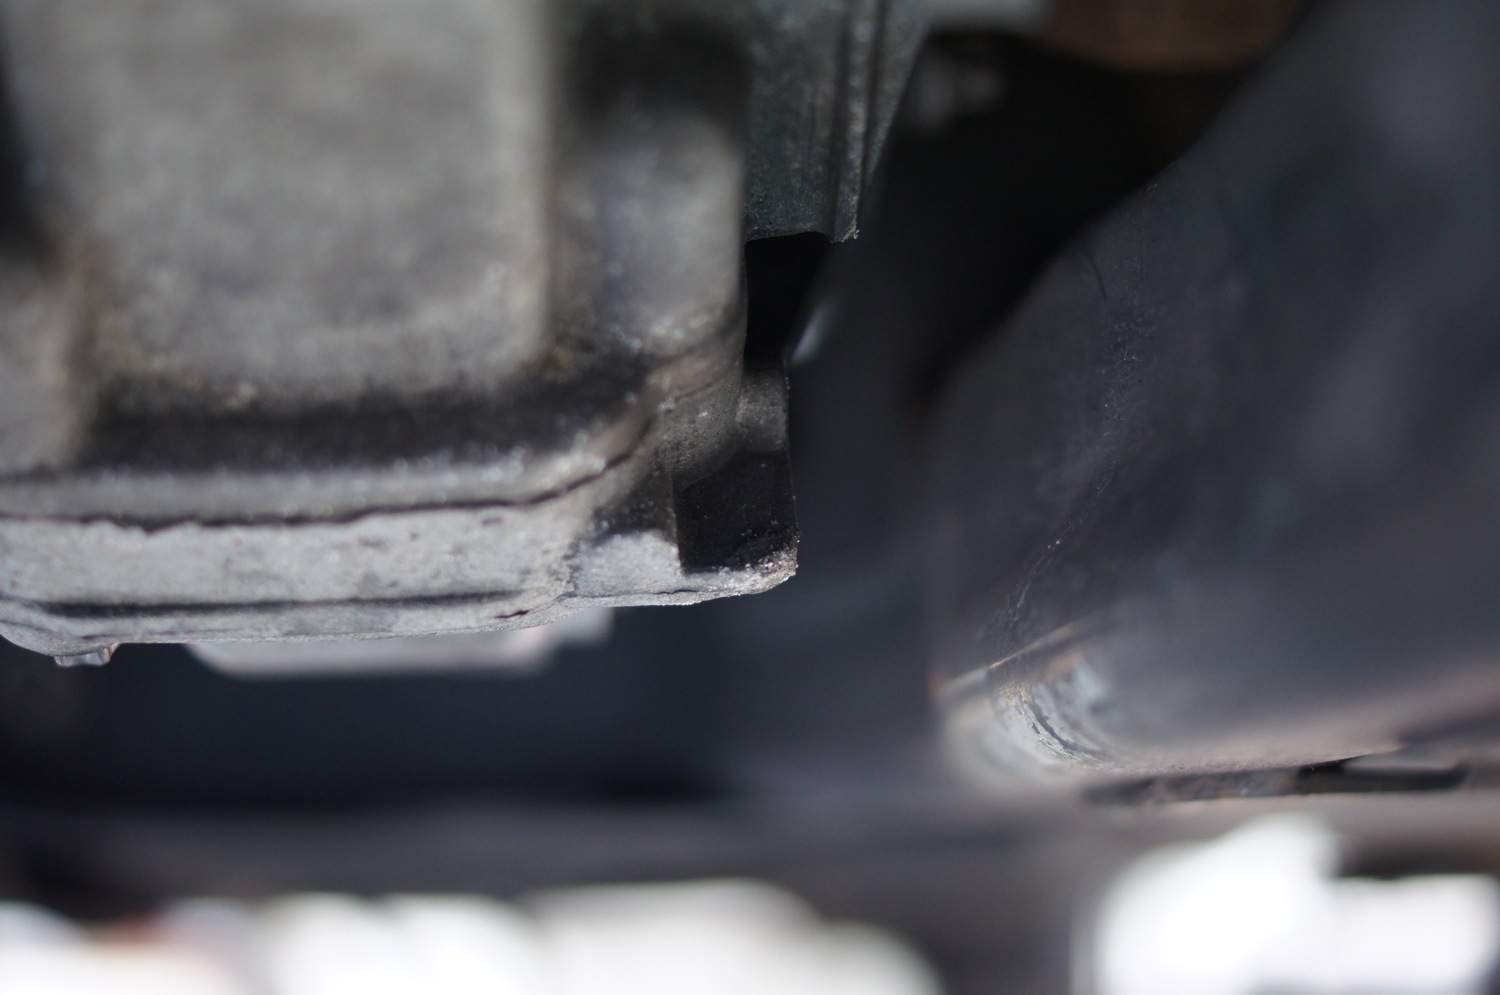
Casing Needs Slight Modification
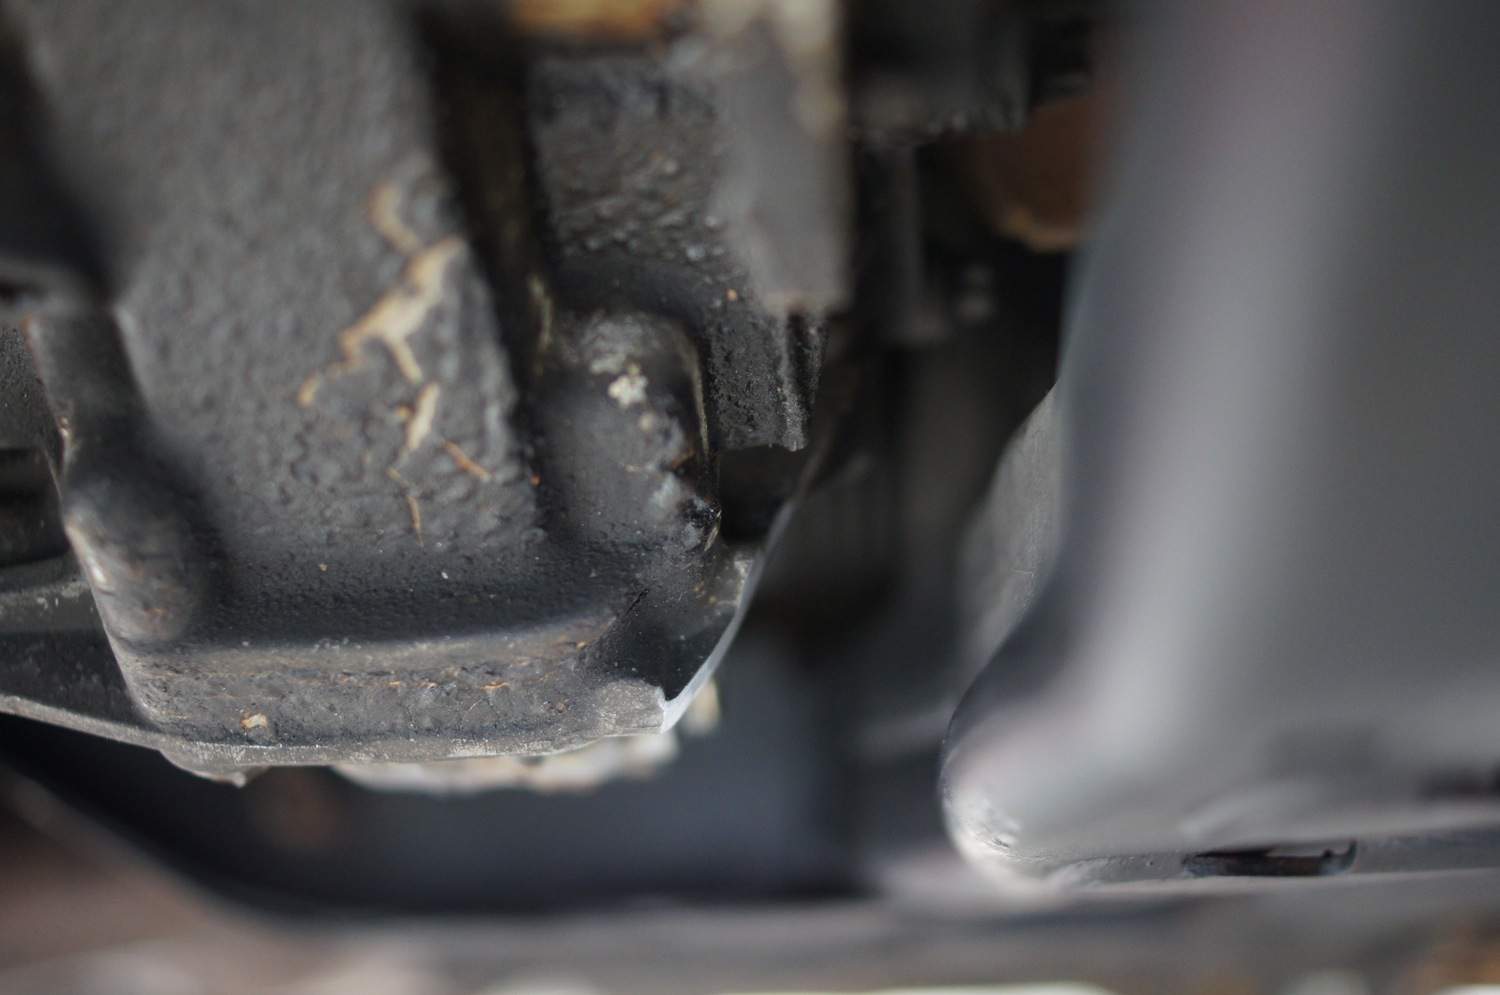
Offending bolt (top) and casing (bottom left) which requires modifying to clear. Rear View:
Casing Needs Slight Modification
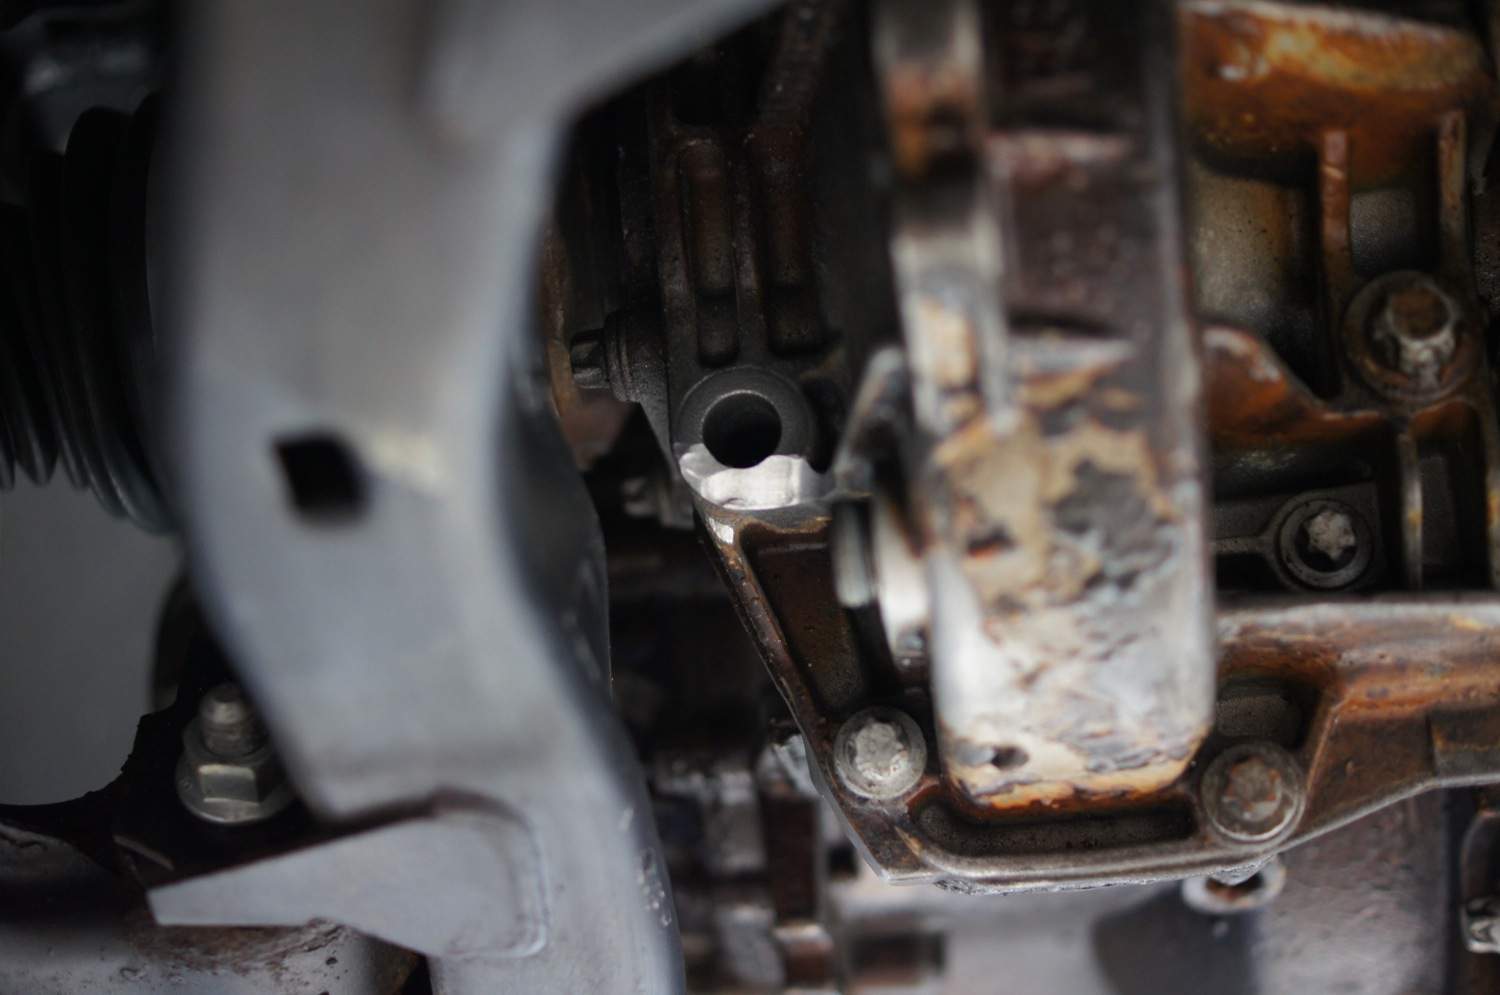
So the excess casting has been removed (bottom right) to give clearance on the oil pipework. Front View:
Casing Modified from Front
Casing Modified
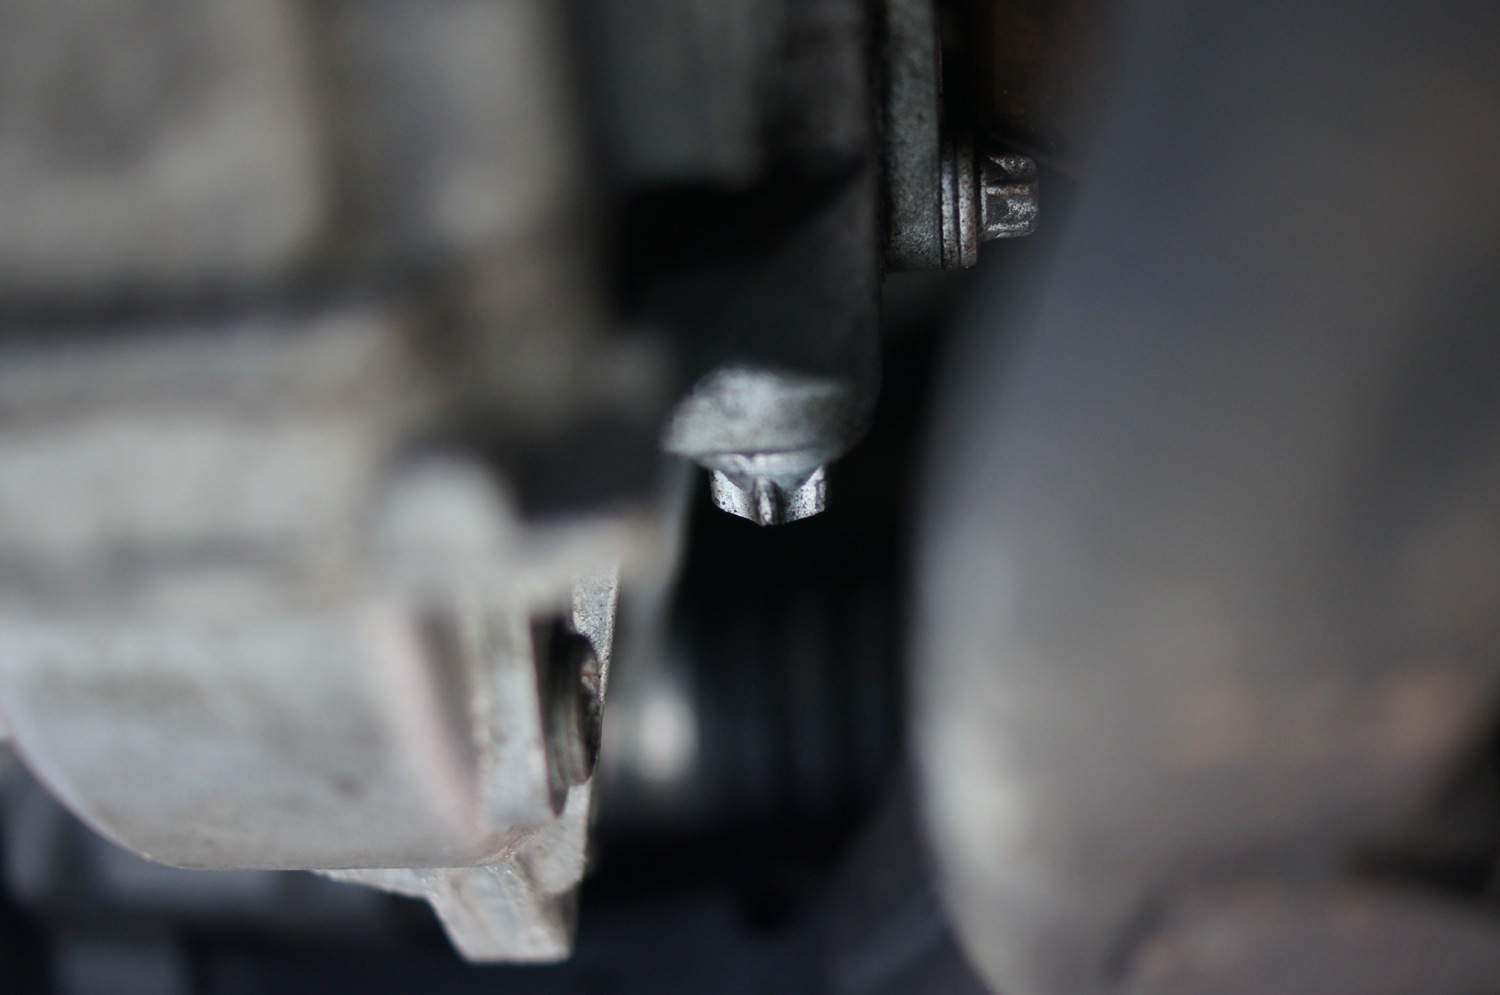
And this is the casing that has been eased. The bolt had to be removed to do this but this was plugged while it was done. Rear View:
Casing Modified from Rear
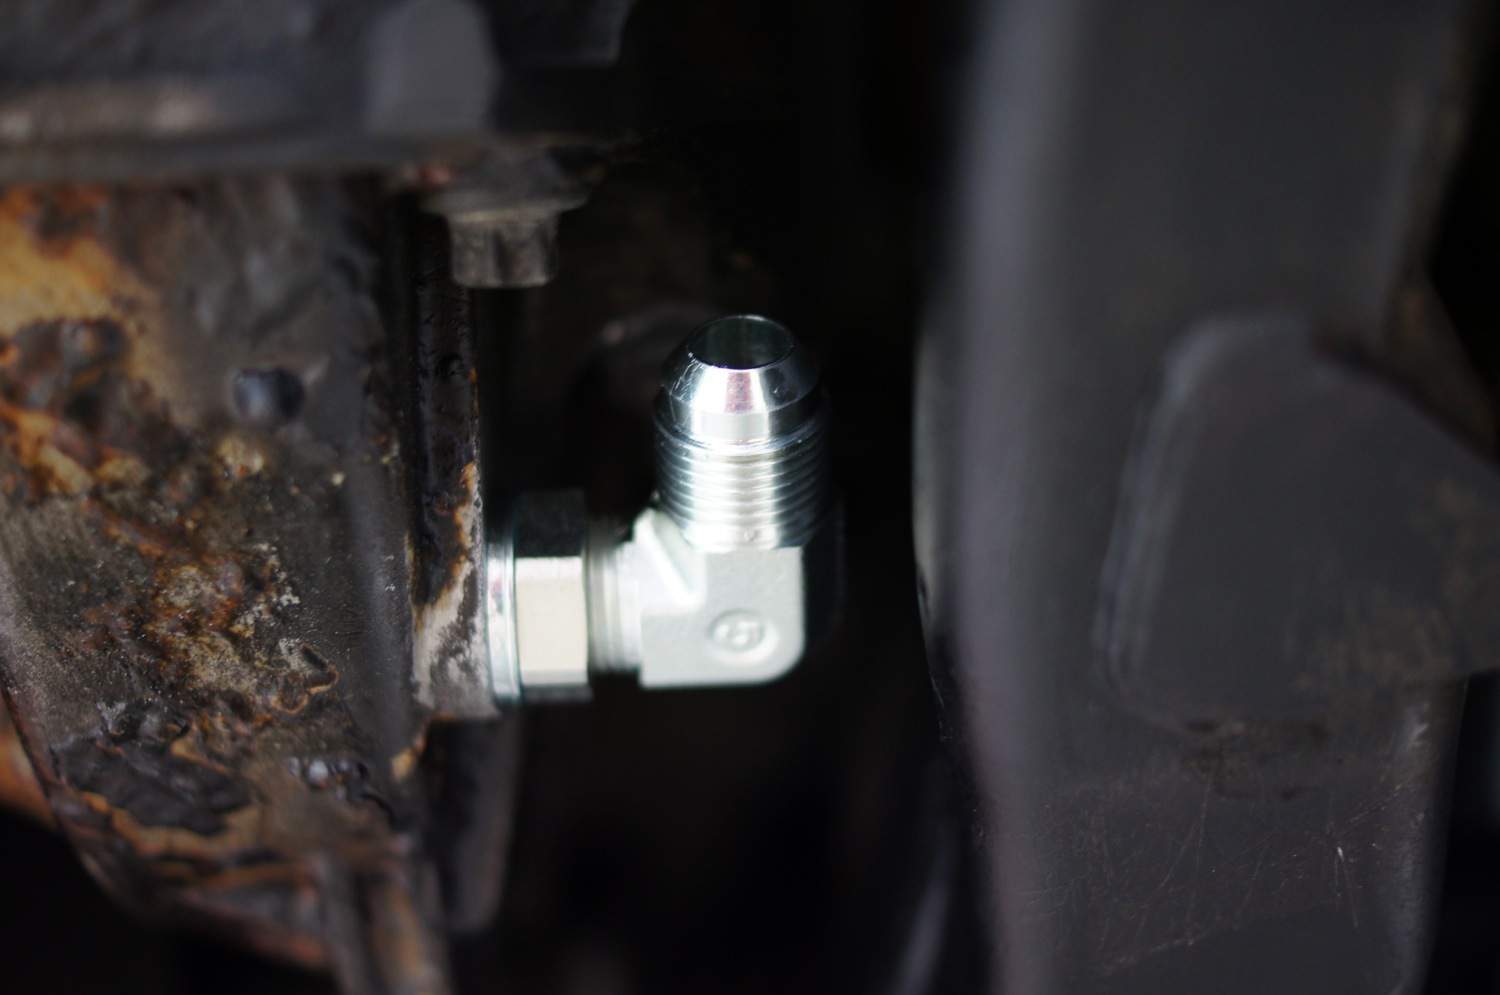
So the outlet fitting now clears and fits into the gearbox, with good clearance on the subframe:
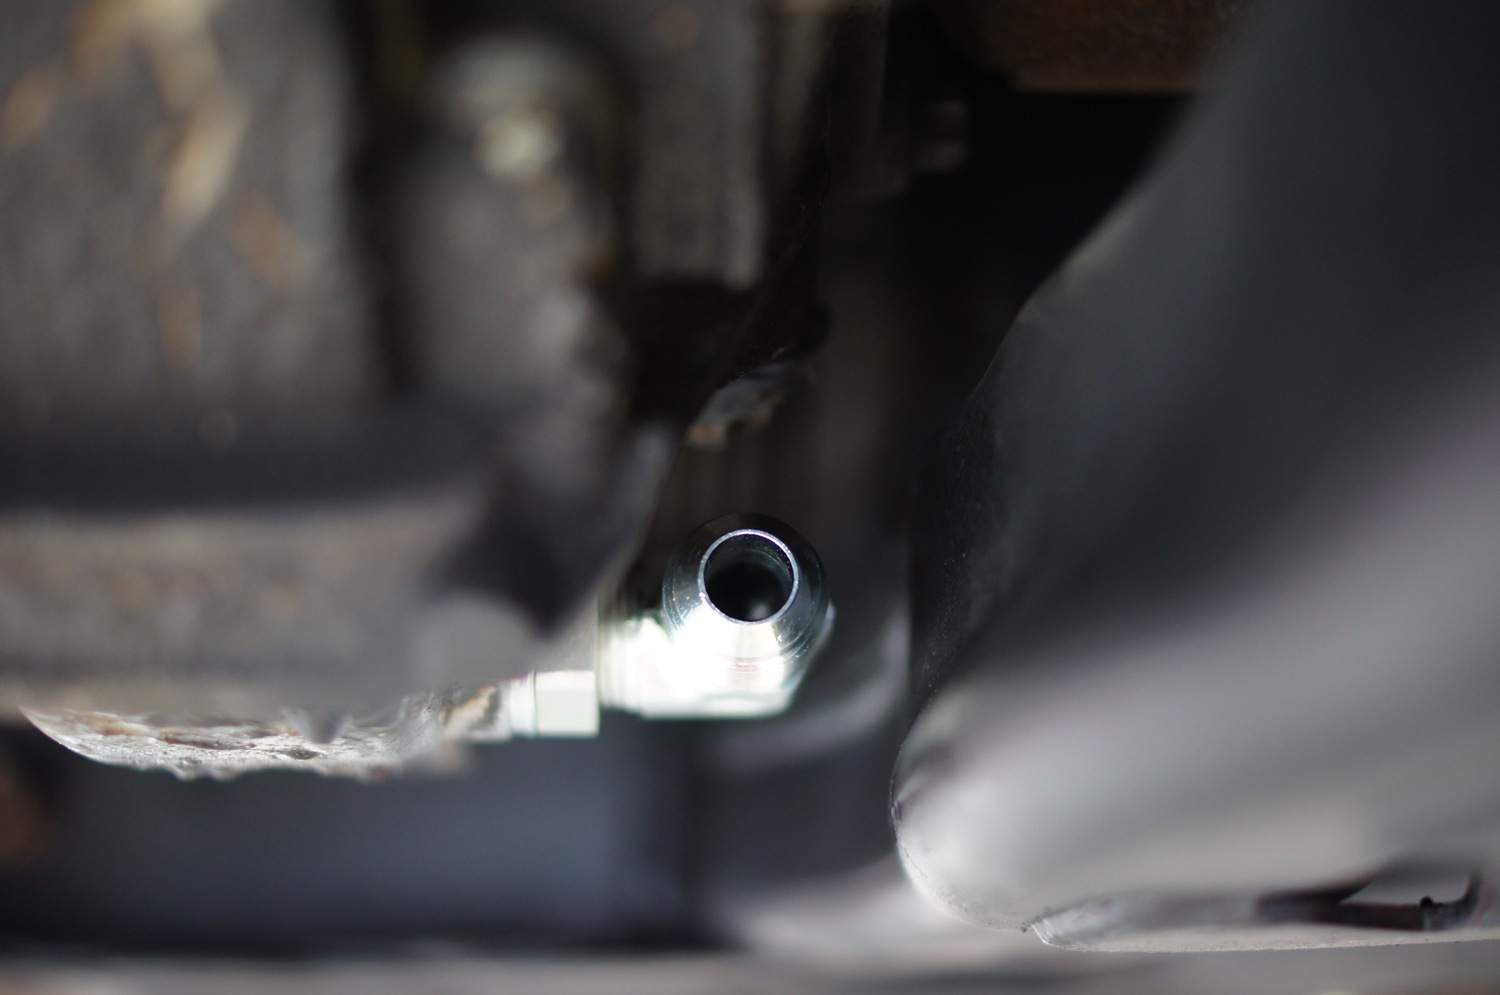
Outlet Fitting
And from underneath:
Outlet Fitting
Outlet Fitting
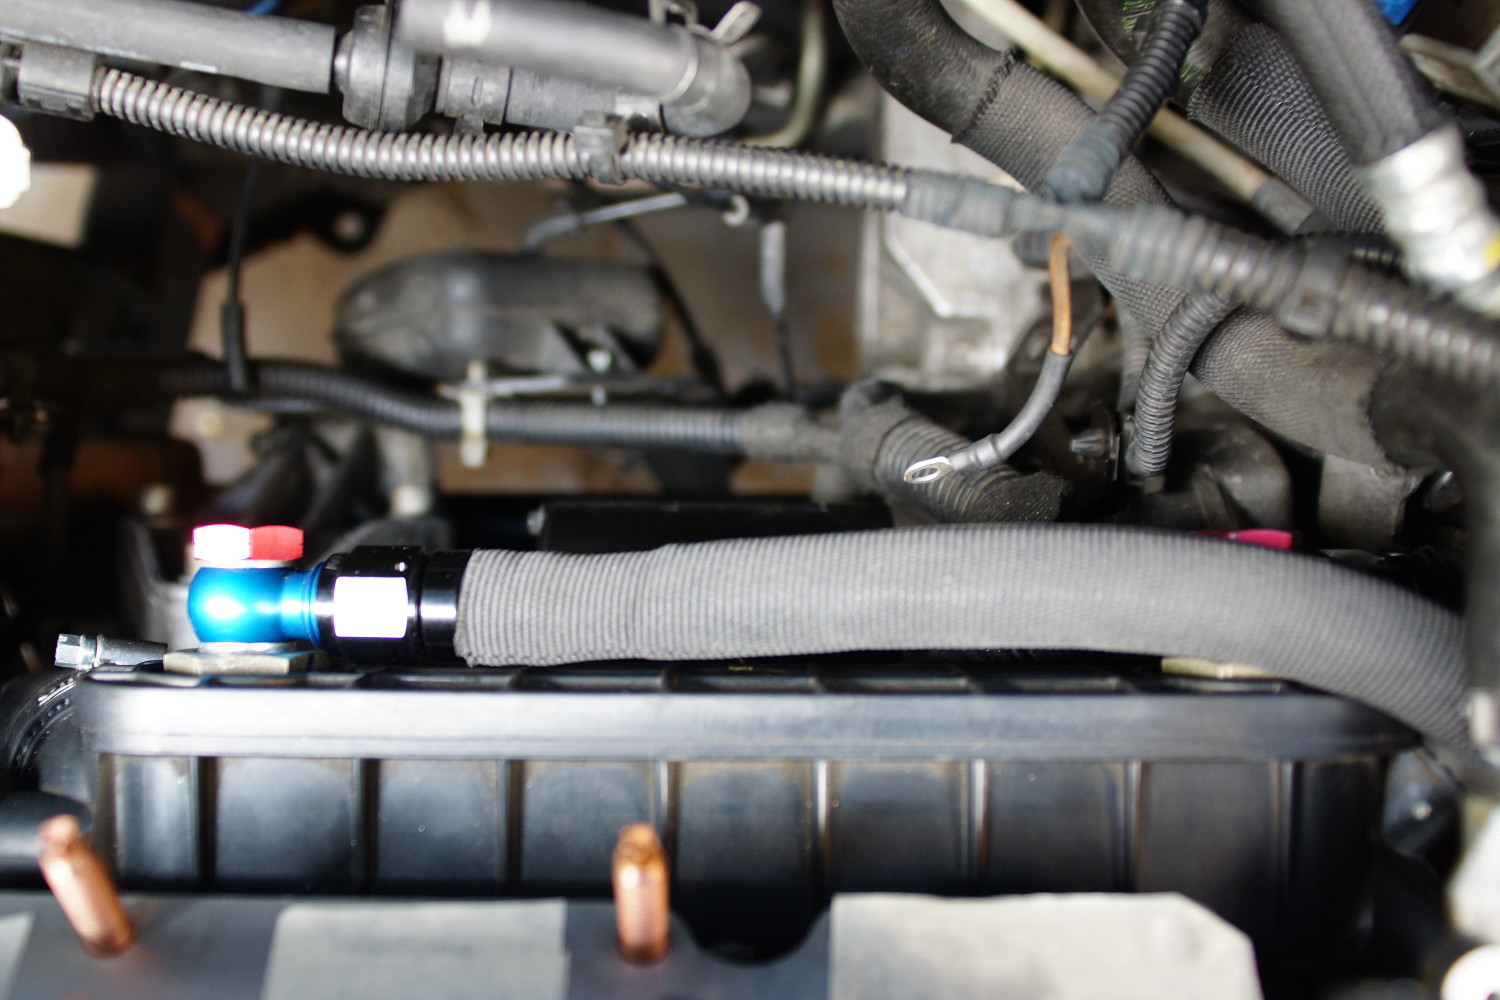
This is the outlet pipework to the oil pump including the in-line oil filter:

Outlet Pipework with Oil Filter
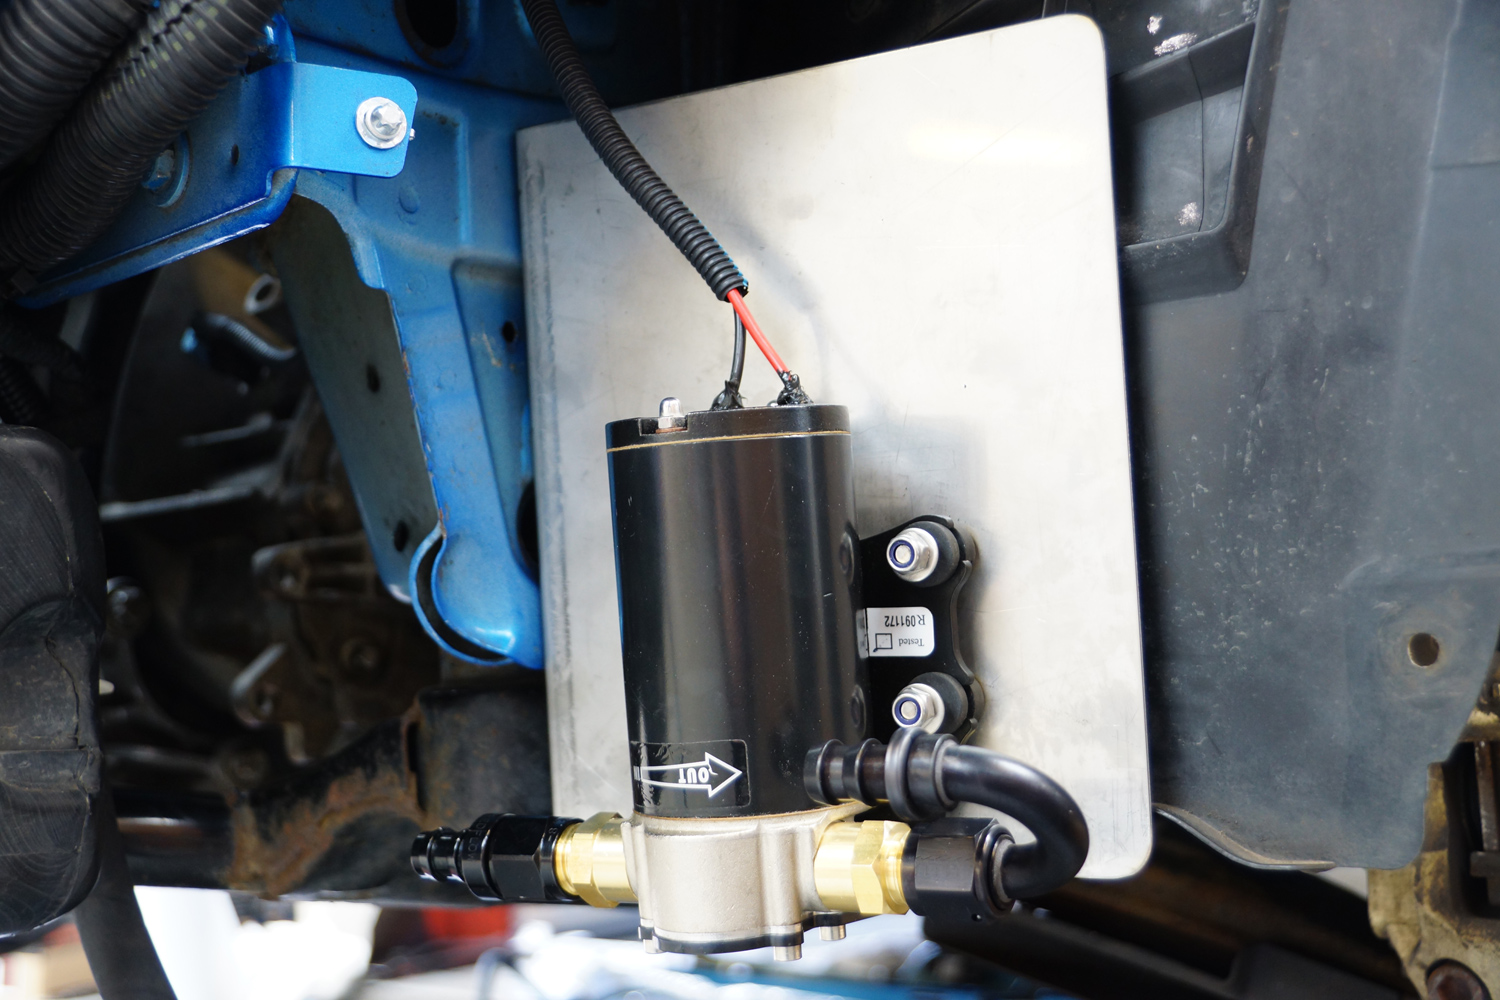
And finally everything mounted and connected up:
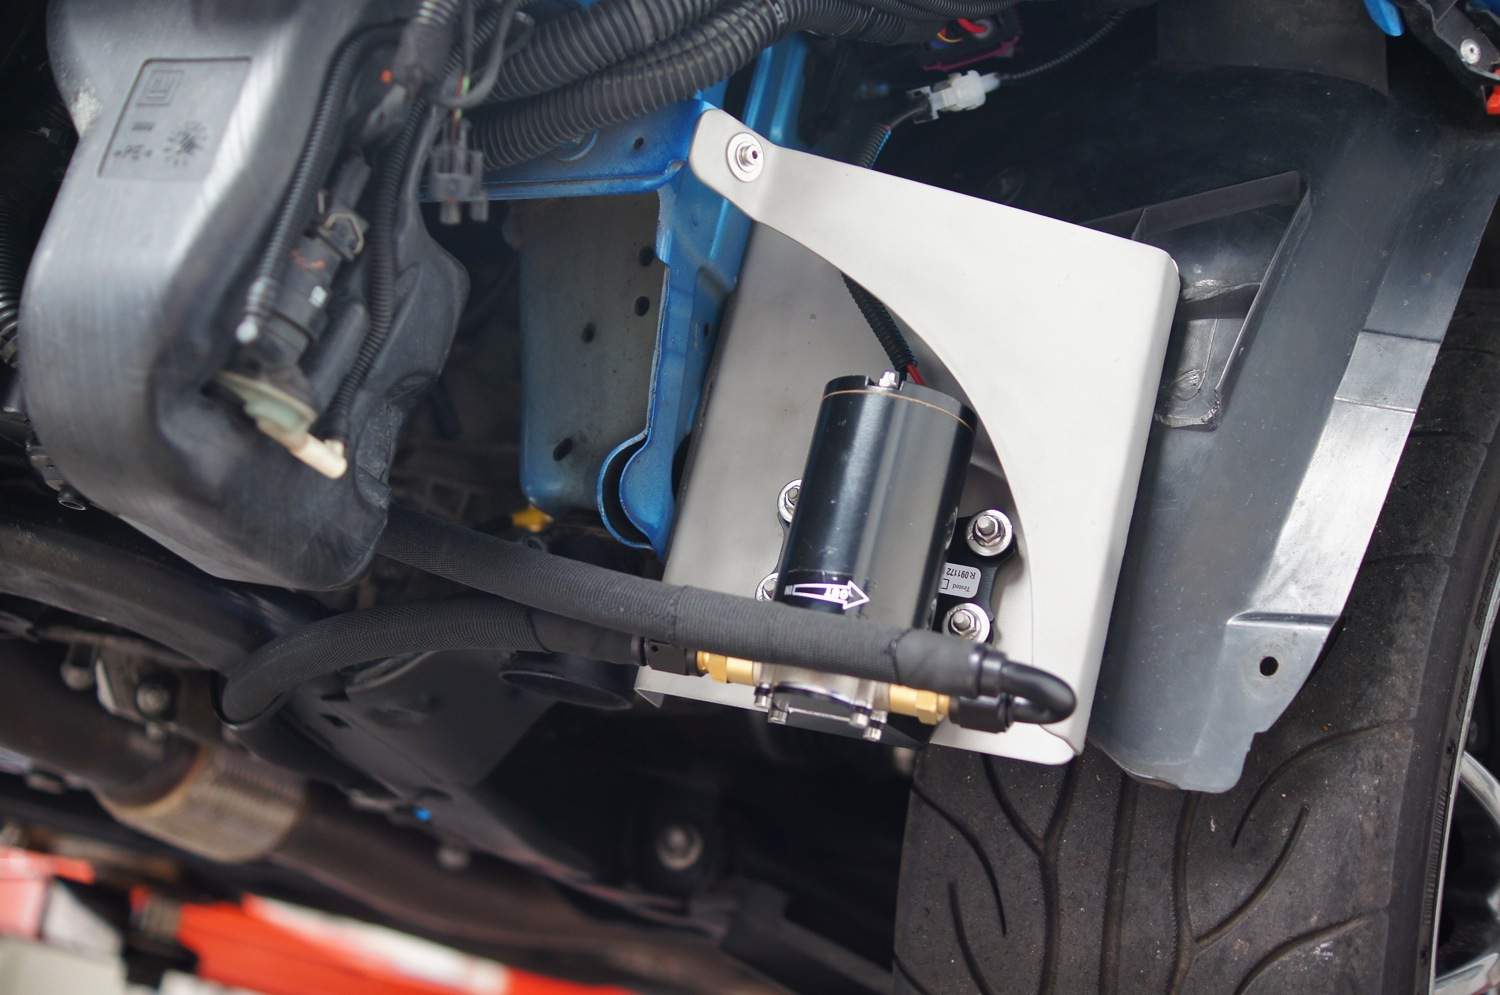
Oil Pump Mounted on Bracket
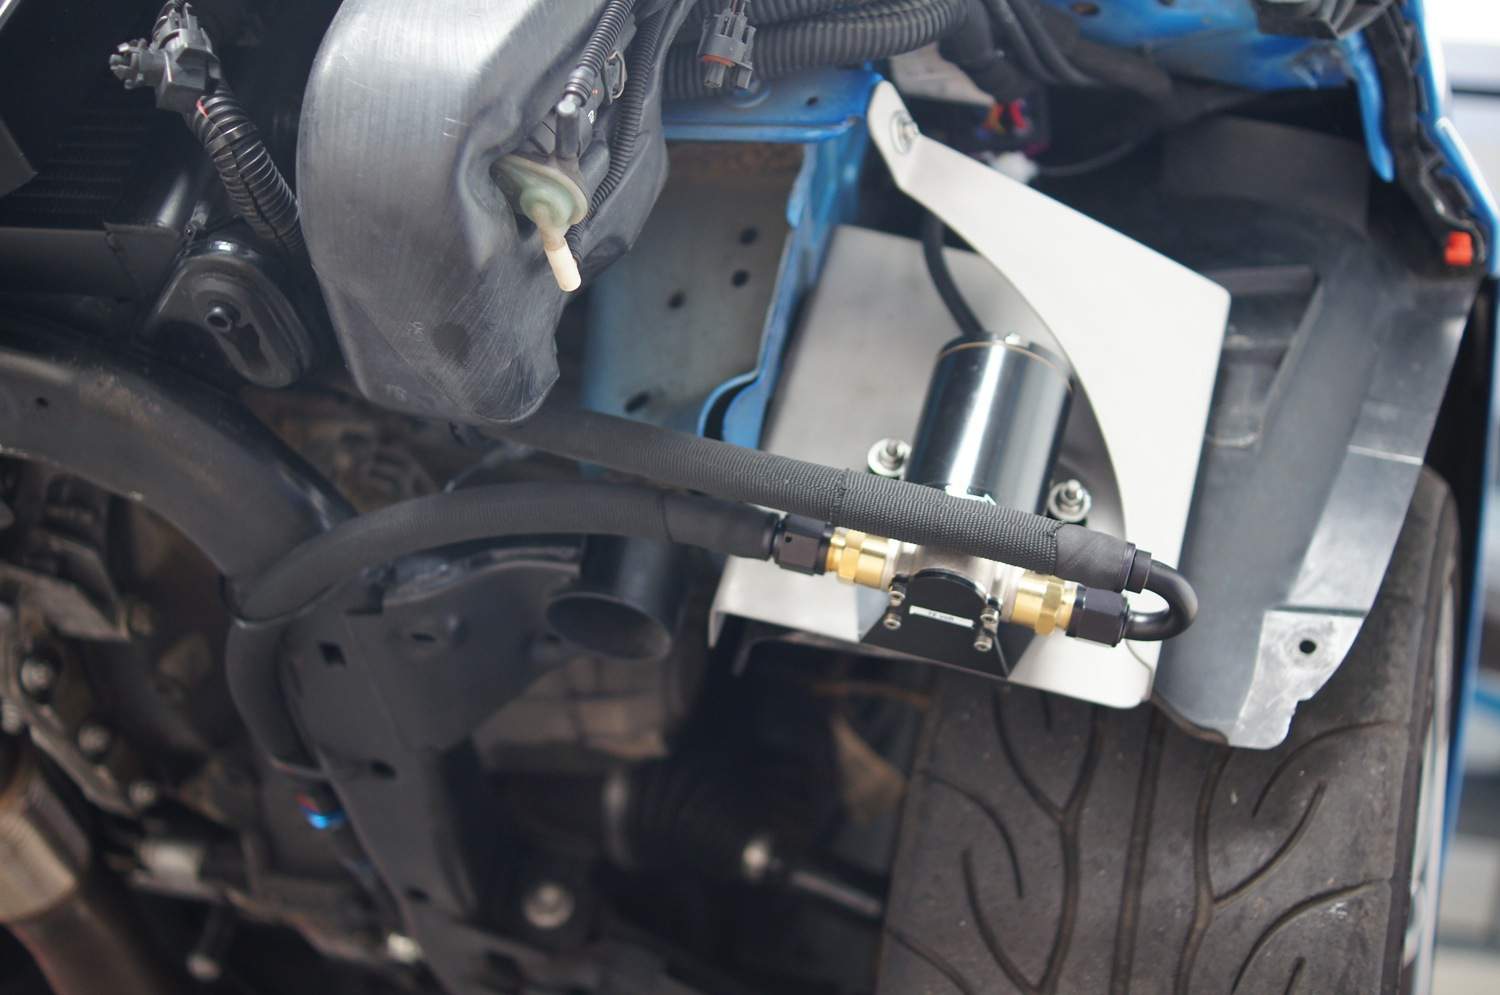
Oil Pump Mounted on Bracket
As with the engine oil cooler hoses I am using some OE heat shrinkable fabric sleeve which is designed to protect hoses from abrasion. Black Heatshrinkable Fabric Sleeving for additional oil cooler lines, to retain an OE look. Highly flexible heatshrink woven fabric tubing, Polyolefin/Polyester construction for excellent abrasion resistance 125°C operating temperature (excellent abrasion resistance to 135°C), Heat shrinkable to grip substrates tightly without additional fixing, Easy to install, Designed primarily to provide mechanical abrasion protection for components such as rubber hoses, plastic pipes and harness wiring bundles.
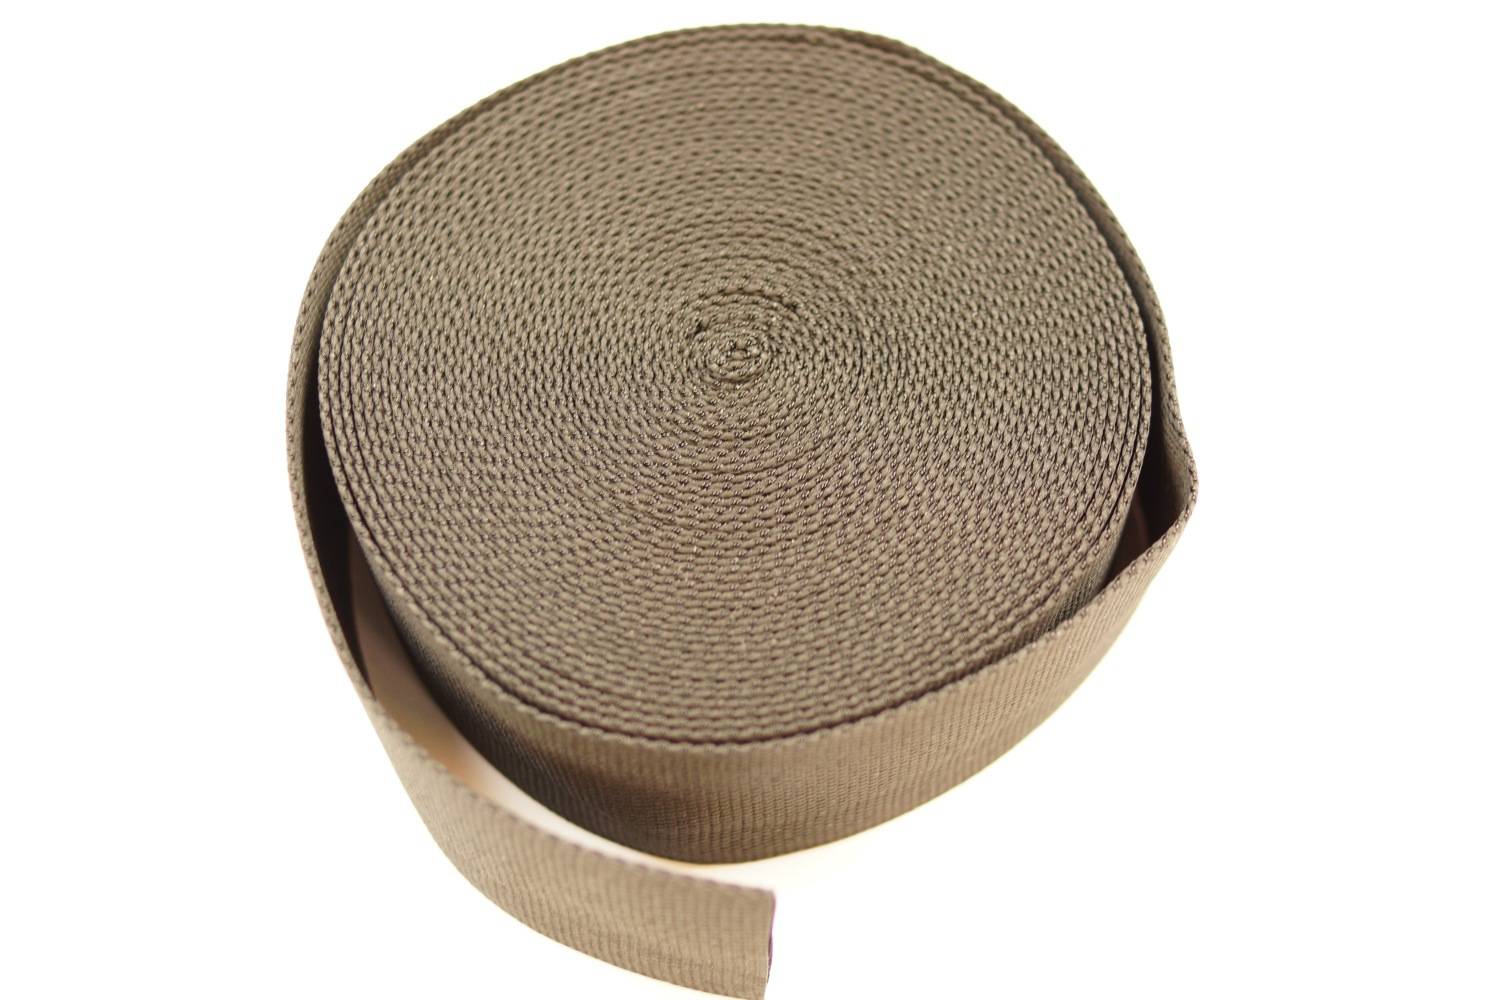
Heatshrinkable Fabric Sleeve
Again as with the engine oil cooler provision has also been made for an oil temperature gauge sender to monitor the gearbox oil temperature, so the pump can be operated as required when the temperature starts to rise past 100 degrees C. I sourced a Speedflow M18x1.5 to ⅛th NPT aluminium adapter from Australia, because I could not find it available for sale in the UK.
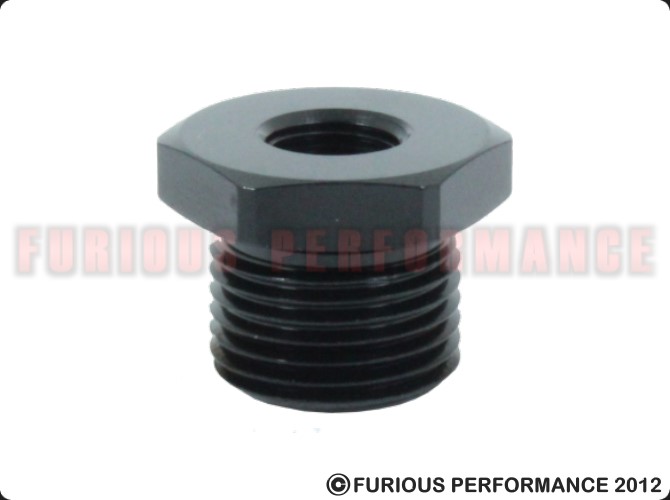
M18x1.5 to ⅛th NPT Adapter
And this fitting has been installed into the level check plug at the front of the gearbox. More about this in the Oil Temperature Gauge post.
Blog detailing the build, modifications, updates, track days and more........

Astra VXR Sprint on Track at Snetterton Circuit