Aeromotive Uprated Fuel Pump
- Mar 29th. 2014
- Posted in Build 2013-2014
- Aeromotive Fuel Pump . Fuel Pump
- By mapw
- Write comment
With the increase in power over the winter period, another area that can be looked at is the fuel pump.
Whilst the factory fuel pump is capable of providing enough fuel for up to round 340bhp or so as they get older there is a possibility that their capability will drop off. For road use the factory pump is more than capable, and it will in most cases be fine for track use, however since there is a good uprated alternative available it makes sense to opt for it.
The Aeromotive in tank fuel pump is capable of providing fuel for for engines producing 450bhp or so, which means it is the ideal choice for track work at the sort of power the car is producing.
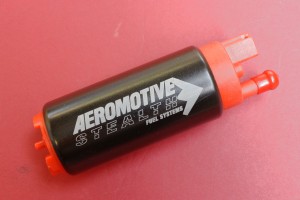
Aeromotive Stealth In Tank Fuel Pump. It is slightly ‘fatter’ than the factory fuel pump:
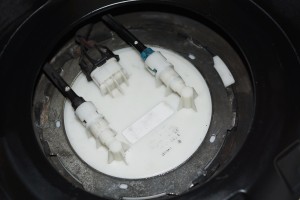
In Tank Fuel Pump Housing In-Situ, with wiring loom plug and fuel pipes connected (Return – Left :: Feed – Right). Access under the plastic bung under the seat base:
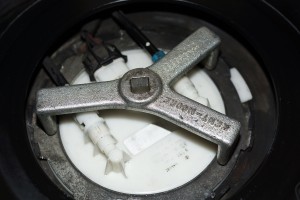
Fuel Pump Housing Locking Ring Removal Tool. Requires a little care and a ½” breaker bar. Disconnect the wiring loom plug and both fuel lines first, taking car to soak up any split fuel with rag (note: make sure the battery has also been disconnected):
Which once unclipped from the in-tank cage allows the
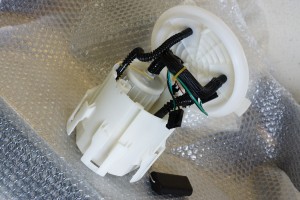
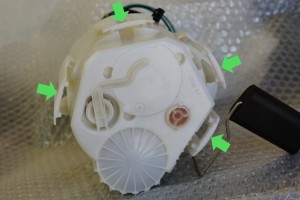
The clips that hold the fuel pump housing into the in-tank cage are arrowed. These must be unclipped to allow the complete housing to be lifted clear of the fuel tank. The hardest one to reach is the one under the fuel sender float (bottom right of the picture). When removing the housing carefully tip any fuel in the housing back into the tank, and use rag to soak up any excess as the housing is lifted clear:
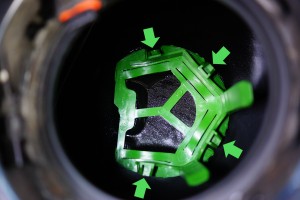
In-Tank cage which corresponds with the clips on the fuel pump housing. Again the hardest one to access when the housing is in the tank is the one shown at the top of the picture:
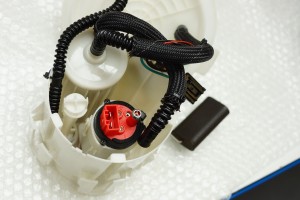
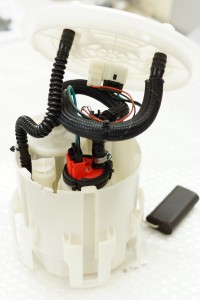
To remove the factory fuel pump, first gently heat the plastic fuel pipe to allow it to be removed. Take care not to melt or break it, however replacement convoluted fuel pipe is available. Unclip the 2 pin wiring connector (which will fit the new pump) and then unclip the plastic cover that holds the OE fuel pump into the tank (there are a couple of clips each side) and the pump can be lifted clear. Now is a good opportunity to give the housing a good wash out.
The aeromotive pump can be dropped into the in-tank housing, and the upper plastic cover which holds the pump in the housing needs to be gently opened out to slide over the new pump, which is slightly fatter. Where the plastic upper cap, which retains the pump into its housing, has to be modified they can become brittle with age and the inner retaining lip comes away. The OE fuel pump is slightly narrower at the top, hence why the retaining cap has to be modified to allow the new pump to fit into it. To ensure a secure fit and to prevent the fuel pump from lifting, some additional sleeving (supplied with the fuel pump) has been used with a cable tie and some securing screws. The pump now sits very securely in the housing with no movement.
The original fuel pipe is then gently warmed and slipped back over the fuel pump outlet and an additional hose clip added for additional security:
Carefully return the complete housing back into the tank and make sure it is clipped back in place. Then refit the upper cover and seal. The seal underneath is a bit awkward to get to seat in the recess of the tank as it needs to be stretched slightly to fit but then doesn’t stay in the recess. Several small blobs of RTV neatly applied in about 6-8 locations around the recess hold the seal in place long enough to get the cover fitted. If the seal isn’t seated correctly, the cover will not sit flush to the seal and the tank will leak.
Then refit the metal retaining ring and reconnect the wiring plug and both fuel lines. The plastic access bung can then be refitted.
